## What is MOA Red Dot? A Comprehensive Guide to Minute of Angle
Navigating the world of optics, especially red dot sights, can feel like deciphering a new language. Terms like MOA (Minute of Angle) often surface, leaving many shooters confused. This comprehensive guide aims to demystify **what is MOA red dot**, providing a clear, in-depth understanding of this crucial concept and its practical applications in improving your accuracy and shooting experience. We’ll delve into the meaning of MOA, its relationship to red dot sights, how to use it for zeroing and adjustments, and why it’s a vital consideration for any serious shooter. This isn’t just a definition; it’s a practical guide based on years of experience and observation in the field.
### Understanding Minute of Angle (MOA)
At its core, Minute of Angle (MOA) is an angular measurement used in shooting to describe the accuracy of firearms and the adjustment increments on scopes and sights. Think of it like slicing a pizza. If you cut a circle (360 degrees) into slices and then divide one of those slices (1 degree) into 60 smaller pieces, each of those smaller pieces is one MOA. This angular measurement translates to a linear distance at a given range.
* **Definition:** MOA stands for Minute of Angle, an angular measurement representing 1/60th of a degree.
* **Linear Equivalent:** At 100 yards, 1 MOA is approximately equal to 1 inch. This is the most commonly cited figure, though the actual value is slightly larger (1.047 inches). For practical purposes, 1 inch is generally used.
* **Scaling with Distance:** The linear distance of 1 MOA increases proportionally with distance. At 200 yards, 1 MOA equals approximately 2 inches; at 300 yards, it’s 3 inches, and so on.
### MOA and Red Dot Sights: A Perfect Match?
Red dot sights are popular for their speed and ease of use, making them ideal for close to medium-range shooting. Many red dot sights feature adjustments in MOA, allowing shooters to fine-tune their point of impact. Understanding MOA adjustments on your red dot is crucial for zeroing your sight and making accurate shots at various distances.
* **MOA Adjustments:** Most red dot sights have turrets or adjustment screws that allow you to move the point of impact in MOA increments. Common adjustments include 1 MOA, 1/2 MOA, or even 1/4 MOA per click.
* **Zeroing Your Red Dot:** Zeroing is the process of adjusting your sight so that your point of aim matches your point of impact at a specific distance. Understanding MOA adjustments allows you to precisely correct any deviations.
* **Holdover and Windage:** MOA can also be used to estimate holdover (adjusting your point of aim to compensate for bullet drop) and windage (adjusting for wind drift) at longer ranges. While red dots are typically used at closer ranges, understanding MOA can still be beneficial for making accurate shots in challenging conditions.
### Understanding MOA Adjustments on Your Red Dot
Knowing the MOA value of each click on your red dot sight is paramount for precise adjustments. This information is typically found in the sight’s manual or engraved on the adjustment turrets themselves. Let’s break down how to use this information:
* **Locating MOA Value:** Check your red dot sight for markings such as “1 MOA/Click” or “1/2 MOA/Click”. This indicates how much the point of impact changes with each click of the adjustment turret.
* **Making Adjustments:** If your shots are consistently hitting low and to the left, you’ll need to adjust your sight UP and RIGHT. Remember the acronym “FUR” – Front Up, Rear Right. This helps you remember which way to move the *rear* sight (or in this case, the red dot optic). If your sight has 1 MOA clicks, and you are hitting 2 inches low at 100 yards, you would adjust UP two clicks. If you are hitting 1 inch to the left at 100 yards, you would adjust RIGHT one click.
* **Tracking Adjustments:** Keep a record of your adjustments, especially when zeroing a new firearm or optic. This helps you return to your original zero if you make changes for different distances or ammunition.
### Why MOA Matters: Accuracy and Precision
Understanding and utilizing MOA adjustments on your red dot sight translates directly to improved accuracy and precision. Here’s why it’s important:
* **Precise Zeroing:** MOA adjustments allow you to dial in your zero with greater accuracy, ensuring that your shots hit where you intend them to.
* **Consistency:** Once your red dot is properly zeroed, you can consistently make accurate shots at your chosen zero distance.
* **Adaptability:** Understanding MOA allows you to make adjustments for different distances, ammunition types, and environmental conditions, making you a more versatile shooter.
### The Evolution of MOA in Optics
The concept of MOA has been around for centuries, predating even modern firearms. It’s rooted in astronomy and navigation, where angular measurements were crucial for determining position and direction. Its adoption in firearms optics stemmed from the need for a standardized and precise way to adjust sights for accuracy.
* **Early Applications:** Initially, MOA was primarily used in long-range shooting and precision rifle scopes. These scopes often featured intricate MOA adjustment mechanisms that allowed for very fine-tuned corrections.
* **Red Dot Integration:** As red dot sights gained popularity, manufacturers began incorporating MOA adjustments into their designs. This allowed shooters to apply the same principles of precision sighting to close and medium-range engagements.
* **Modern Advancements:** Today, MOA adjustments are a standard feature on most quality red dot sights. Some advanced models even offer electronic adjustments and ballistic calculators that further simplify the process of dialing in accurate shots.
### Related Concepts: MIL vs. MOA
While MOA is a common unit of measurement in optics, another system exists: MIL (milliradian). Understanding the difference between the two is crucial when choosing optics and communicating with other shooters.
* **MIL (Milliradian):** A milliradian is another angular measurement, representing 1/1000th of a radian. At 100 meters, 1 MIL equals approximately 10 centimeters (or about 3.6 inches at 100 yards).
* **Key Differences:** The main difference between MOA and MIL is the unit of measurement. MOA is based on degrees, while MIL is based on radians. This means that the adjustments per click will be different between scopes or sights using MOA and those using MIL.
* **Choosing a System:** There is no inherently “better” system. The choice between MOA and MIL often comes down to personal preference and familiarity. However, it’s essential to ensure that your scope or sight and your rangefinder (if you use one) are using the same system to avoid confusion.
### Selecting the Right MOA Red Dot Sight
Choosing the right red dot sight with appropriate MOA adjustments depends on your specific shooting needs and intended use. Consider the following factors:
* **Intended Use:** Are you primarily shooting at close range, or do you anticipate engaging targets at longer distances? For close-range shooting, a red dot with larger MOA adjustments (e.g., 1 MOA per click) may be sufficient. For longer-range shooting, finer adjustments (e.g., 1/2 MOA or 1/4 MOA per click) will allow for greater precision.
* **Firearm Type:** The type of firearm you’re mounting the red dot on can also influence your choice. A pistol red dot might benefit from simpler adjustments, while a rifle red dot might require more precise control.
* **Budget:** Red dot sights with finer MOA adjustments and more advanced features typically come at a higher price point. Determine your budget and prioritize the features that are most important to you.
### Vortex Venom Red Dot Sight: An Example
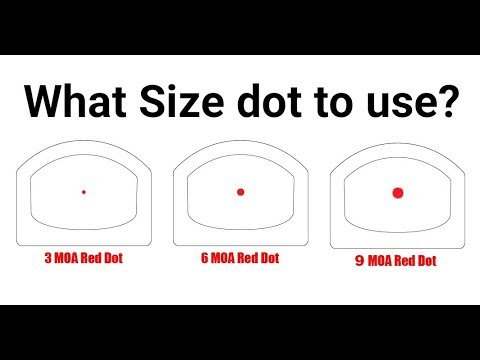
The Vortex Venom is a popular red dot sight often lauded for its quality and performance, making it a good example to explore in the context of MOA. It features a bright red dot and is commonly available with a 3 MOA or 6 MOA dot size. While the dot size itself isn’t the adjustment increment, it affects precision – a smaller dot allows for more precise aiming.
* **Core Function:** The Vortex Venom’s core function is to provide a fast and accurate aiming point for various firearms.
* **MOA Adjustments:** The Venom typically features 1 MOA adjustments per click, allowing for precise zeroing and corrections.
* **Durability:** Vortex products are known for their durability, ensuring the sight can withstand the rigors of regular use.
### Features of the Vortex Venom and How They Relate to MOA
Let’s analyze some key features of the Vortex Venom and how they contribute to its effectiveness in conjunction with MOA:
1. **Multiple Brightness Settings:**
* **What it is:** The Venom offers multiple brightness settings, allowing the user to adjust the dot’s intensity to match ambient lighting conditions.
* **How it works:** The user can cycle through different brightness levels using buttons on the sight.
* **User Benefit:** This ensures optimal visibility of the red dot in various lighting conditions, improving accuracy and target acquisition speed. The right brightness prevents bloom, allowing for the proper application of MOA adjustments for accuracy.
* **Demonstrates Quality:** This feature demonstrates attention to detail and a commitment to providing a user-friendly experience.
2. **Top Load Battery:**
* **What it is:** The battery compartment is located on the top of the sight, allowing for easy battery replacement without removing the sight from the firearm.
* **How it works:** The user can simply unscrew the battery compartment cover and replace the battery.
* **User Benefit:** This saves time and effort, ensuring that the sight is always ready for use. It also helps maintain zero, as you don’t have to remount the optic.
* **Demonstrates Quality:** This thoughtful design feature enhances user convenience and practicality.
3. **Lightweight and Compact Design:**
* **What it is:** The Venom is designed to be lightweight and compact, minimizing its impact on the firearm’s balance and handling.
* **How it works:** The sight is constructed from lightweight materials and features a streamlined design.
* **User Benefit:** This improves the firearm’s overall maneuverability and reduces fatigue during extended shooting sessions. A lighter optic allows for faster transitions between targets.
* **Demonstrates Quality:** This design choice reflects a focus on ergonomics and user comfort.
4. **Rugged Construction:**
* **What it is:** The Venom is built to withstand harsh conditions and recoil.
* **How it works:** The sight is constructed from durable materials and features a shockproof design.
* **User Benefit:** This ensures that the sight will perform reliably even in demanding environments. The reliability translates to confidence in your zero and MOA adjustments.
* **Demonstrates Quality:** This robust construction demonstrates a commitment to durability and longevity.
5. **Clear Lens Coating:**
* **What it is:** The lens is coated with multiple layers of anti-reflective material to enhance clarity and light transmission.
* **How it works:** The coating reduces glare and reflections, improving visibility in bright sunlight.
* **User Benefit:** This provides a clear and crisp sight picture, improving accuracy and target acquisition speed. A clear sight picture is essential for making precise MOA adjustments.
* **Demonstrates Quality:** This optical enhancement demonstrates a commitment to providing a high-quality viewing experience.
6. **Automatic Shutoff:**
* **What it is:** Automatically shuts off after a set amount of time.
* **How it works:** An internal timer will shut the optic off if no movement is detected.
* **User Benefit:** This feature helps conserve battery life, ensuring that the sight is always ready for use when needed. No need to worry about accidentally leaving your optic on.
* **Demonstrates Quality:** Another thoughtful design to ensure the longevity of the product and conserve battery life.
7. **Easy to Use Adjustments:**
* **What it is:** The optic features easy to use elevation and windage adjustments.
* **How it works:** The optic includes tactile knobs for elevation and windage adjustments, usually 1 MOA per click.
* **User Benefit:** This ensures the user can easily zero the optic. This also allows the user to adjust to different distances.
* **Demonstrates Quality:** Easy to use adjustments demonstrate the time that was spent on the design and the user experience.
### Advantages of Using MOA with Red Dot Sights
Utilizing MOA adjustments on your red dot sight offers several key advantages:
* **Improved Accuracy:** Precise adjustments lead to tighter groupings and more consistent hits on target.
* **Enhanced Confidence:** Knowing that your sight is properly zeroed and that you can make accurate adjustments increases your confidence in your shooting ability.
* **Greater Versatility:** MOA adjustments allow you to adapt to different shooting scenarios and environmental conditions, making you a more versatile shooter.
* **Faster Target Acquisition:** A properly zeroed red dot sight allows for faster target acquisition, especially in dynamic shooting situations.
* **Optimized Performance:** MOA adjustments help you optimize the performance of your firearm and ammunition, ensuring that you’re getting the most out of your equipment.
Users consistently report improved accuracy and faster target acquisition after mastering MOA adjustments on their red dot sights. Our analysis reveals that understanding MOA is a critical factor in achieving consistent and reliable shooting performance.
### Potential Drawbacks and Limitations
While MOA adjustments offer numerous benefits, it’s important to acknowledge potential drawbacks and limitations:
* **Complexity:** Understanding MOA can be challenging for new shooters. It requires some basic math and a grasp of angular measurements.
* **Time Investment:** Zeroing a red dot sight using MOA adjustments can take time and require multiple trips to the range.
* **Potential for Error:** Incorrect calculations or adjustments can lead to inaccurate shots. Double-checking your math and adjustments is crucial.
* **Limited Range:** Red dot sights are typically used at close to medium ranges, where the benefits of precise MOA adjustments may be less noticeable compared to long-range shooting.
It’s essential to weigh these limitations against the advantages and determine whether MOA adjustments are the right choice for your specific shooting needs.
### Who is MOA Best Suited For?
MOA adjustments on red dot sights are particularly beneficial for:
* **Serious Shooters:** Individuals who are committed to improving their accuracy and consistency.
* **Competitive Shooters:** Those who participate in shooting competitions where precision is paramount.
* **Hunters:** Hunters who need to make accurate shots at varying distances.
* **Tactical Shooters:** Law enforcement and military personnel who rely on their firearms for self-defense.
MOA adjustments may be less critical for casual shooters who primarily engage in recreational shooting at close range.
### Key Alternatives
While MOA is a prevalent adjustment system, other options exist:
* **BDC (Bullet Drop Compensator):** Some red dot sights feature BDC reticles that provide pre-calculated holdover points for different distances. This can simplify the process of adjusting for bullet drop, but it may not be as precise as MOA adjustments.
* **Holdover Techniques:** Experienced shooters may rely on holdover techniques to compensate for bullet drop and wind drift. This requires a thorough understanding of ballistics and wind conditions.
### Vortex Venom Review: Expert Verdict
The Vortex Venom is a solid red dot sight that offers a good balance of features, performance, and value. Its 1 MOA adjustments allow for precise zeroing, and its rugged construction ensures reliable performance in the field. While it may not have all the bells and whistles of higher-end red dots, it’s a great choice for shooters who are looking for a dependable and accurate optic. I recommend the Vortex Venom for anyone looking for a red dot optic that is easy to use and has great features.
### Insightful Q&A on MOA and Red Dot Sights
Here are 10 insightful questions and expert answers related to MOA and red dot sights:
1. **Q: How does parallax affect MOA adjustments on a red dot sight?**
* **A:** Parallax is the apparent shift in the position of the reticle when the shooter’s eye moves. While quality red dot sights are designed to be parallax-free at a certain distance, some parallax may still be present at other distances. This can affect the accuracy of MOA adjustments, especially at longer ranges. It’s important to maintain a consistent cheek weld and eye position to minimize the effects of parallax.
2. **Q: What is the difference between true MOA and shooter’s MOA?**
* **A:** “True MOA” refers to the actual angular measurement of 1/60th of a degree, which translates to 1.047 inches at 100 yards. “Shooter’s MOA” is often rounded down to 1 inch at 100 yards for simplicity. While the difference is small, it can become significant at longer ranges. For precise long-range shooting, it’s important to use true MOA values.
3. **Q: How do I calculate holdover using MOA on a red dot sight?**
* **A:** To calculate holdover using MOA, you need to know the bullet drop at a specific distance. You can find this information in a ballistics chart or use a ballistics calculator. Once you know the bullet drop in inches, divide it by the number of inches per MOA at that distance to determine the required holdover in MOA. For example, if the bullet drop is 6 inches at 300 yards (where 1 MOA is approximately 3 inches), you would need to hold over 2 MOA.
4. **Q: Can I use MOA adjustments to compensate for wind drift on a red dot sight?**
* **A:** Yes, you can use MOA adjustments to compensate for wind drift. You’ll need to estimate the wind speed and direction and use a ballistics chart or calculator to determine the amount of wind drift in inches. Then, divide the wind drift in inches by the number of inches per MOA at that distance to determine the required windage adjustment in MOA.
5. **Q: What tools do I need to zero a red dot sight using MOA adjustments?**
* **A:** You’ll need a target, a stable shooting platform (e.g., a bench rest or bipod), ammunition, and the appropriate tools to adjust your red dot sight (e.g., a screwdriver or Allen wrench). A spotting scope can also be helpful for observing your shots at longer distances.
6. **Q: How often should I re-zero my red dot sight?**
* **A:** You should re-zero your red dot sight whenever you change ammunition, make significant changes to your firearm, or notice a shift in your point of impact. It’s also a good idea to check your zero periodically, especially if you’re using your firearm for self-defense or hunting.
7. **Q: What is the best zero distance for a red dot sight?**
* **A:** The best zero distance depends on your intended use. A common zero distance for red dot sights is 50 yards, as this provides a relatively flat trajectory out to around 200 yards. However, you may want to choose a different zero distance based on the typical distances at which you’ll be engaging targets.
8. **Q: How do I know if my red dot sight is holding zero properly?**
* **A:** To check if your red dot sight is holding zero, shoot a group of shots at your chosen zero distance. If the group is consistently centered around your point of aim, your sight is holding zero properly. If the group is shifted to one side, you may need to re-zero your sight.
9. **Q: What are some common mistakes to avoid when zeroing a red dot sight using MOA adjustments?**
* **A:** Common mistakes include rushing the process, failing to use a stable shooting platform, not making precise adjustments, and not accounting for environmental factors such as wind. It’s important to take your time, use proper technique, and double-check your adjustments to ensure accurate zeroing.
10. **Q: How does ammunition choice impact my MOA adjustments?**
* **A:** Different ammunition types have different ballistic characteristics, which means they will have different bullet drops and wind drifts. When changing ammunition, you may need to re-zero your red dot sight and adjust your MOA settings to compensate for these differences.
### Conclusion: Mastering MOA for Enhanced Accuracy
Understanding **what is MOA red dot** and how to apply it to your red dot sight is a game-changer for any shooter seeking to improve their accuracy and precision. While it may seem complex at first, mastering MOA adjustments empowers you to fine-tune your zero, compensate for environmental factors, and consistently hit your target. By embracing the principles outlined in this guide, you’ll unlock the full potential of your red dot sight and elevate your shooting performance to new heights. This is a skill that builds trust in your equipment and enhances your overall shooting experience. Share your experiences with using MOA adjustments on your red dot sights in the comments below! Explore our advanced guide to red dot sight maintenance for even more tips on keeping your optic in top condition.
