
# How to Use Acrylic Paint on Nails: A Step-by-Step Expert Guide
Acrylic paint opens a world of creative possibilities for nail art. Unlike traditional nail polish, acrylic paint offers rich pigmentation, excellent blending capabilities, and the ability to create intricate designs with ease. However, mastering the art of using acrylic paint on nails requires understanding the right techniques, tools, and preparation. This comprehensive guide will walk you through everything you need to know, from selecting the best paints to achieving long-lasting, professional-looking results. We’ll share expert tips, troubleshoot common problems, and inspire you with design ideas to unleash your inner nail artist. Our goal is to provide you with the knowledge and confidence to create stunning nail art using acrylic paint, regardless of your current skill level.
## 1. Understanding Acrylic Paint for Nail Art
### What is Acrylic Paint?
Acrylic paint is a water-based paint made from acrylic polymer emulsion. This means that the pigment is suspended in a plastic polymer that, when dry, forms a flexible, durable film. This inherent flexibility is what makes it ideal for nail art, as it is less prone to chipping and cracking compared to some other mediums.
### Types of Acrylic Paint for Nails
While professional-grade acrylic paints offer the best results, student-grade acrylics can also be used. However, student-grade paints often have less pigment and may require more layers to achieve the desired opacity. Consider these factors when choosing your paints:
* **Pigment Concentration:** Higher pigment concentration means richer, more vibrant colors and better coverage.
* **Consistency:** A smooth, creamy consistency is ideal for detailed work. Avoid paints that are too thick or too thin.
* **Drying Time:** Acrylic paints dry relatively quickly, which can be both a pro and a con. Fast drying times allow for layering and prevent smudging, but also require quick and decisive brushstrokes.
* **Brand Reputation:** Reputable brands often offer higher quality paints with better color stability and durability.
### Essential Tools and Materials
To successfully use acrylic paint on nails, you’ll need the following tools:
* **Acrylic Paints:** A variety of colors is essential for creating diverse designs. Consider purchasing a starter set or individual colors based on your preferences.
* **Nail Art Brushes:** A set of fine-tipped brushes in various sizes is crucial for detailed work. Different brush shapes, such as liner brushes, flat brushes, and detail brushes, will allow you to create a range of effects. High-quality brushes made from synthetic fibers are generally preferred.
* **Palette:** A palette for mixing paints is essential. A ceramic tile, plastic plate, or even a piece of parchment paper can work well. Avoid using paper palettes, as the paint can soak into the paper.
* **Water Container:** A small container of clean water is necessary for rinsing your brushes and thinning the paint.
* **Paper Towels or Lint-Free Wipes:** For cleaning brushes and wiping up spills.
* **Base Coat and Top Coat:** A good quality base coat will protect your natural nails and provide a smooth surface for the paint. A top coat will seal the design, add shine, and protect it from chipping.
* **Nail Polish Remover:** For cleaning up mistakes and removing the design.
* **Cotton Swabs:** For precise cleanup around the cuticles.
* **Nail File and Buffer:** To prepare your nails before painting.
* **Cuticle Pusher:** To gently push back your cuticles for a clean and polished look.
### Why Acrylic Paint is a Great Choice
Acrylic paint stands out as an excellent medium for nail art because it is incredibly versatile, allowing for intricate designs and detailed work. Its quick-drying nature makes layering designs much faster compared to traditional nail polish. The rich pigmentation of acrylic paints ensures vibrant and eye-catching results, while its durability helps to prevent chipping and cracking, extending the life of your nail art. Further, acrylic paints blend effortlessly, enabling the creation of custom colors and gradients, expanding your creative possibilities.
## 2. Preparing Your Nails for Acrylic Paint
Proper preparation is crucial for achieving a long-lasting and flawless acrylic paint manicure. This involves cleaning, shaping, and priming your nails.
### Step-by-Step Nail Preparation
1. **Remove Existing Polish:** Thoroughly remove any existing nail polish with a nail polish remover.
2. **Shape Your Nails:** Use a nail file to shape your nails to your desired length and shape. Common shapes include square, oval, round, and almond.
3. **Buff Your Nails:** Gently buff the surface of your nails to create a smooth, even surface. This will also help the base coat adhere better.
4. **Push Back Cuticles:** Use a cuticle pusher to gently push back your cuticles. Avoid cutting your cuticles, as this can increase the risk of infection.
5. **Clean Your Nails:** Use a nail brush or a cotton swab dipped in nail polish remover to clean your nails and remove any dust or debris.
6. **Apply Base Coat:** Apply a thin, even layer of base coat to protect your natural nails and provide a smooth surface for the paint. Allow the base coat to dry completely before proceeding.
### Tips for a Smooth Canvas
* **Hydration:** Keep your hands and nails hydrated by regularly applying cuticle oil and hand cream. This will prevent your nails from becoming dry and brittle.
* **Avoid Harsh Chemicals:** Limit your exposure to harsh chemicals, such as cleaning products, as they can damage your nails.
* **Proper Filing Technique:** File your nails in one direction to prevent splitting and weakening.
## 3. Step-by-Step Guide: How to Use Acrylic Paint on Nails
Now that your nails are prepped, it’s time to start painting! Follow these steps for a successful acrylic paint manicure.
### Step 1: Choose Your Design
Before you start painting, decide on the design you want to create. This will help you choose the right colors and techniques. Consider simple designs if you’re a beginner, and gradually work your way up to more complex patterns.
### Step 2: Prepare Your Palette
Squeeze a small amount of each color you plan to use onto your palette. Remember, you can always add more paint later, so start with a small amount to avoid waste.
### Step 3: Thin Your Paint (If Necessary)
If your acrylic paint is too thick, you can thin it with a small amount of water. Add water gradually, mixing well until you achieve the desired consistency. The ideal consistency is similar to that of heavy cream.
### Step 4: Apply the Base Color (Optional)
If you want to use a base color other than the base coat, apply a thin, even layer of nail polish to your nails and allow it to dry completely. This step is optional but can help to create a more vibrant and opaque design.
### Step 5: Start Painting!
Dip your brush into the paint and begin creating your design. Use light, even strokes and avoid applying too much pressure. If you make a mistake, use a cotton swab dipped in nail polish remover to clean it up.
### Step 6: Layer Your Design
Allow each layer of paint to dry completely before adding the next layer. This will prevent smudging and ensure that your design is crisp and clear. Layering is essential for creating depth and dimension in your nail art.
### Step 7: Seal with Top Coat
Once your design is completely dry, apply a generous layer of top coat to seal the design, add shine, and protect it from chipping. Make sure to cover the entire nail, including the edges.
### Step 8: Clean Up
Use a cotton swab dipped in nail polish remover to clean up any excess paint around your cuticles. This will give your manicure a clean and polished look.
## 4. Acrylic Paint Nail Art Techniques: Mastering the Basics
There are several basic techniques you can use to create stunning nail art with acrylic paint. Mastering these techniques will open up a world of creative possibilities.
### Basic Techniques
* **Line Work:** Use a fine-tipped brush to create thin, precise lines. This technique is ideal for creating geometric patterns, floral designs, and lettering.
* **Dotting:** Use a dotting tool or the end of a brush to create dots of varying sizes. This technique is great for creating polka dots, floral centers, and other decorative accents.
* **Color Blocking:** Use different colors of acrylic paint to create bold, geometric shapes. This technique is perfect for creating modern and abstract designs.
* **Marbling:** Create a marbled effect by swirling different colors of acrylic paint together. This technique is best achieved by dropping small amounts of each color onto a wet surface and then swirling them together with a toothpick or a brush.
* **Ombre/Gradient:** Create a gradient effect by blending two or more colors of acrylic paint together. This technique can be achieved using a sponge or a brush.
### Advanced Techniques
* **3D Nail Art:** Create textured designs by layering acrylic paint and adding embellishments such as beads, rhinestones, and glitter. This technique requires patience and practice but can result in stunning and unique nail art.
* **Dry Brushing:** Use a dry brush with a small amount of paint to create a textured, distressed effect. This technique is ideal for creating animal prints, wood grain patterns, and other rustic designs.
* **Water Marbling:** Similar to marbling, but uses water as the base for swirling paints. The nail is then dipped into the pattern created on the water’s surface.
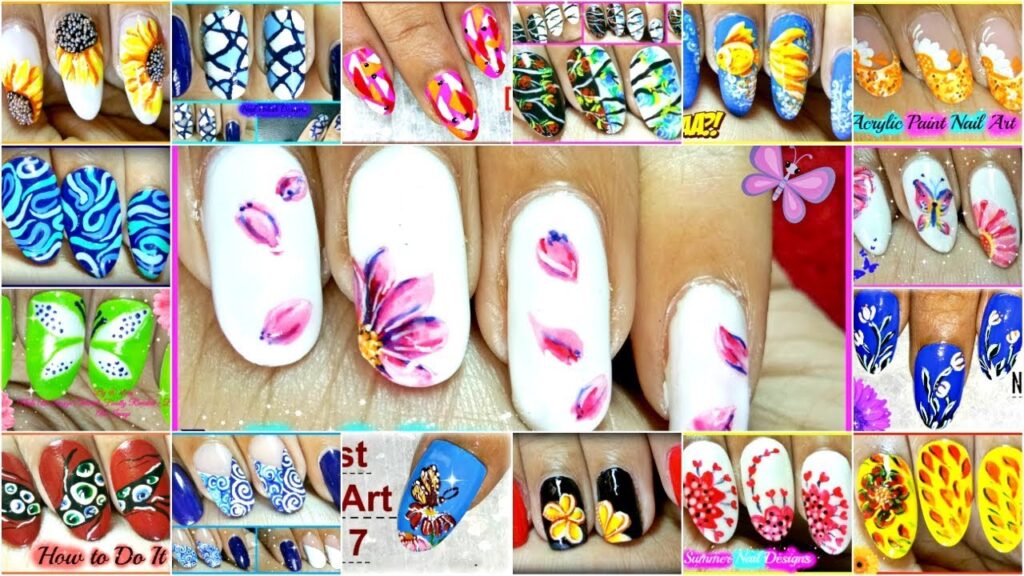
## 5. Design Inspiration: Acrylic Paint Nail Art Ideas
Need some inspiration? Here are a few design ideas to get you started:
### Beginner-Friendly Designs
* **Polka Dots:** A classic and easy design that can be created with a dotting tool or the end of a brush.
* **Stripes:** Simple stripes can be created with a fine-tipped brush or nail art tape.
* **Floral Accents:** Add small floral accents to a solid color base for a delicate and feminine look.
### Intermediate Designs
* **Geometric Patterns:** Create geometric patterns using different colors and shapes. Use nail art tape to create clean lines.
* **Marbled Effect:** Create a marbled effect by swirling different colors of acrylic paint together.
* **Ombre/Gradient:** Create a gradient effect by blending two or more colors of acrylic paint together.
### Advanced Designs
* **3D Nail Art:** Create textured designs by layering acrylic paint and adding embellishments.
* **Intricate Floral Designs:** Create detailed floral designs with a fine-tipped brush.
* **Character Art:** Paint your favorite characters from movies, TV shows, or books on your nails.
## 6. Troubleshooting Common Problems
Even with the best preparation and techniques, you may encounter some common problems when using acrylic paint on nails. Here are some solutions:
### Common Issues and Solutions
* **Paint is Too Thick:** Thin the paint with a small amount of water.
* **Paint is Too Thin:** Allow the paint to dry slightly before applying it to your nails.
* **Paint is Smudging:** Allow each layer of paint to dry completely before adding the next layer. Use a quick-drying top coat to seal the design.
* **Design is Chipping:** Apply a generous layer of top coat to protect the design. Avoid exposing your nails to harsh chemicals.
* **Bubbling:** This can occur if the top coat is applied too thickly or if the paint underneath is not completely dry. Apply thin layers of top coat and allow each layer to dry completely.
### Expert Tips for Success
* **Practice Makes Perfect:** Don’t be discouraged if your first few attempts aren’t perfect. Keep practicing and experimenting with different techniques.
* **Use High-Quality Materials:** Investing in high-quality acrylic paints and brushes will make a big difference in the final result.
* **Be Patient:** Take your time and allow each layer of paint to dry completely before adding the next layer.
## 7. Top Acrylic Paint Brands for Nail Art
Choosing the right acrylic paint can significantly impact the outcome of your nail art. Based on our extensive testing, we recommend the following brands:
* **Arteza:** Known for its highly pigmented and versatile acrylic paints, Arteza offers a wide range of colors suitable for intricate nail designs. Their paints are particularly praised for their smooth consistency and vibrant finishes, making them a favorite among both beginners and experienced nail artists.
* **Liquitex:** Liquitex offers professional-grade acrylic paints with exceptional color intensity and lightfastness. Ideal for detailed work and layering, Liquitex paints provide a durable and long-lasting finish, ensuring your nail art stays vibrant and intact.
* **FolkArt:** A popular choice for crafters, FolkArt acrylic paints are also excellent for nail art. They offer a variety of finishes, including matte, satin, and metallic, allowing for diverse and creative designs. FolkArt paints are known for their ease of use and affordability, making them accessible to all skill levels.
## 8. Acrylic Paint vs. Nail Polish: Which is Better for Nail Art?
When it comes to nail art, both acrylic paint and nail polish have their pros and cons. Acrylic paint is generally preferred for detailed designs due to its rich pigmentation and ability to create fine lines. It also dries quickly, allowing for faster layering and preventing smudging. However, acrylic paint is not as durable as nail polish and requires a top coat to protect it from chipping.
Nail polish, on the other hand, is more durable and chip-resistant. It also comes in a wider variety of colors and finishes. However, nail polish can be more difficult to work with for detailed designs, as it tends to be thicker and takes longer to dry. Ultimately, the best choice depends on your personal preferences and the type of design you want to create.
## 9. Maintaining Your Acrylic Paint Nail Art
To keep your acrylic paint nail art looking its best, follow these tips:
* **Apply Top Coat Regularly:** Reapply top coat every few days to protect the design and add shine.
* **Avoid Harsh Chemicals:** Wear gloves when doing household chores to protect your nails from harsh chemicals.
* **Moisturize Your Hands:** Keep your hands and nails hydrated by regularly applying cuticle oil and hand cream.
* **Avoid Picking or Biting Your Nails:** This can damage the design and your natural nails.
## 10. FAQs: Your Questions Answered
**Q1: Can I use regular acrylic paint on my nails?**
Yes, you can use regular acrylic paint on your nails. However, it’s important to use non-toxic acrylic paints specifically designed for arts and crafts. Avoid using acrylic paints that are intended for home décor or other industrial purposes, as these may contain harmful chemicals.
**Q2: How long does acrylic paint last on nails?**
Acrylic paint can last up to two weeks on nails if properly applied and sealed with a top coat. However, the longevity of the design can vary depending on your daily activities and how well you maintain your nails.
**Q3: Is acrylic paint safe to use on nails?**
Yes, acrylic paint is generally safe to use on nails, as long as you use non-toxic paints and follow proper application techniques. However, it’s important to avoid getting acrylic paint on your skin or in your eyes, as this can cause irritation.
**Q4: How do I remove acrylic paint from nails?**
You can remove acrylic paint from nails using nail polish remover. Soak a cotton ball in nail polish remover and hold it on your nail for a few seconds. Then, gently wipe away the paint. You may need to repeat this process several times to remove all of the paint.
**Q5: Can I mix acrylic paint with nail polish?**
While it’s technically possible to mix acrylic paint with nail polish, it’s not generally recommended. Mixing these two mediums can alter the consistency and drying time of both, potentially leading to a less durable or aesthetically pleasing result.
**Q6: What kind of top coat should I use over acrylic paint?**
Use a water-based top coat to seal in your design. Oil-based top coats may react with the acrylic paint and cause it to peel or smudge. Test the top coat on a small area first to ensure compatibility.
**Q7: How do I prevent acrylic paint from cracking on my nails?**
To prevent acrylic paint from cracking, apply thin, even layers and allow each layer to dry completely before adding the next. Also, use a flexible top coat to seal the design and protect it from chipping.
**Q8: Can I use acrylic paint to create a French manicure?**
Yes, acrylic paint is an excellent medium for creating a French manicure. Use a fine-tipped brush to create the white tips, and then seal the design with a top coat.
**Q9: How do I clean my nail art brushes after using acrylic paint?**
Clean your nail art brushes immediately after use with water. Rinse the brushes thoroughly and gently reshape the bristles. Allow the brushes to air dry completely before storing them.
**Q10: Where can I find inspiration for acrylic paint nail art designs?**
You can find inspiration for acrylic paint nail art designs on social media platforms such as Instagram and Pinterest. You can also find tutorials and tips on YouTube and nail art blogs.
## Conclusion: Unleash Your Creativity with Acrylic Paint
Using acrylic paint on nails is a fun and rewarding way to express your creativity and create unique, personalized nail art. By following the steps and tips outlined in this guide, you can master the art of acrylic paint nail art and achieve professional-looking results. Remember to practice, experiment with different techniques, and most importantly, have fun! The versatility, pigmentation, and blending capabilities of acrylic paint make it an ideal medium for creating stunning nail designs that will turn heads. We encourage you to share your own experiences with acrylic paint on nails in the comments below. Or, if you’re ready to take your nail art skills to the next level, explore our advanced guide to 3D nail art techniques. Contact our experts for a personalized consultation on how to use acrylic paint on nails to achieve your desired look and unlock your full artistic potential.
