# What Do You Mix With Acrylic Powder For Nails?: The Definitive Guide
Achieving flawless acrylic nails requires more than just a steady hand and artistic flair. The secret to strong, long-lasting, and beautiful acrylic enhancements lies in understanding the precise science of the mixture. So, what do you mix with acrylic powder for nails? The answer is more complex than a simple ingredient list. It’s a careful balance of powder and liquid monomer, each playing a crucial role in the polymerization process that creates the durable acrylic nail. This comprehensive guide will delve into the intricacies of acrylic mixing, providing you with the knowledge and expertise to create salon-quality nails at home or enhance your professional skills.
This article is your one-stop resource for mastering the art of acrylic nail application. We’ll go beyond the basics, exploring the properties of different monomers, the importance of proper ratios, troubleshooting common mixing problems, and sharing expert tips to ensure your acrylic nails are not only beautiful but also safe and long-lasting. Whether you’re a beginner just starting your acrylic journey or a seasoned nail technician looking to refine your technique, this guide will provide valuable insights to elevate your skills and achieve consistently stunning results. We aim to provide a trustworthy guide, supported by both theoretical understanding and practical experience, to help you confidently navigate the world of acrylic nails.
## Understanding Acrylic Monomer: The Liquid’s Role
The liquid component, known as the monomer, is the catalyst that transforms acrylic powder into a workable substance. Choosing the right monomer is crucial for achieving optimal results. Let’s explore the different types and their properties:
### Ethyl Methacrylate (EMA) vs. Methyl Methacrylate (MMA)
This is arguably the most important distinction in the world of acrylic monomers. EMA is the industry-standard and preferred choice for professional nail technicians. MMA, on the other hand, is a dental acrylic that is sometimes used in cheaper or unregulated salons. Here’s why EMA is superior:
* **Adhesion:** EMA adheres properly to the natural nail plate, allowing for safe and easy removal. MMA, conversely, bonds too strongly, often requiring forceful filing that can damage the nail.
* **Safety:** EMA is considered safer and less likely to cause allergic reactions compared to MMA. MMA has been linked to nail damage, allergic contact dermatitis, and even respiratory problems.
* **Flexibility:** EMA creates a more flexible and natural-feeling acrylic enhancement, reducing the risk of cracking or lifting. MMA creates a rigid and brittle acrylic that is prone to breakage.
**Recommendation:** Always insist on EMA monomer for your acrylic nails. If a salon uses MMA, it’s best to find a different establishment.
### Monomer Additives: Enhancing Performance
Many monomers contain additives that enhance their performance and improve the overall acrylic application experience. Common additives include:
* **UV Stabilizers:** These protect the acrylic from yellowing due to sun exposure.
* **Plasticizers:** These increase the flexibility and durability of the acrylic.
* **Inhibitors:** These prevent premature polymerization in the bottle, extending the shelf life of the monomer.
### Choosing the Right Monomer for Your Needs
When selecting a monomer, consider the following factors:
* **Brand Reputation:** Opt for reputable brands known for their high-quality ingredients and consistent performance. Look for brands with strong reviews and positive feedback from nail professionals.
* **Drying Time:** Monomers vary in their drying time. Faster-drying monomers are ideal for experienced technicians who work quickly, while slower-drying monomers are more forgiving for beginners.
* **Odor:** Some monomers have a strong, pungent odor, while others are formulated to be low-odor. Consider your sensitivity to smells and choose a monomer that is comfortable for you to work with.
## Acrylic Powder: The Foundation of Your Nails
Acrylic powder comes in a wide variety of colors, finishes, and formulations. Understanding the different types of powder will allow you to create custom nail designs and achieve specific effects.
### Polymer Types: Different Formulations for Specific Needs
Acrylic powders are typically made from polymers, and variations in the polymer composition can affect the powder’s properties:
* **Standard Acrylic Powder:** This is the most common type of powder and is suitable for general acrylic nail applications.
* **Quick-Set Acrylic Powder:** This powder dries faster than standard powder, making it ideal for experienced technicians or for creating intricate designs.
* **Slow-Set Acrylic Powder:** This powder dries slower, providing more time to work with the product and perfect your application. This is beneficial for beginners.
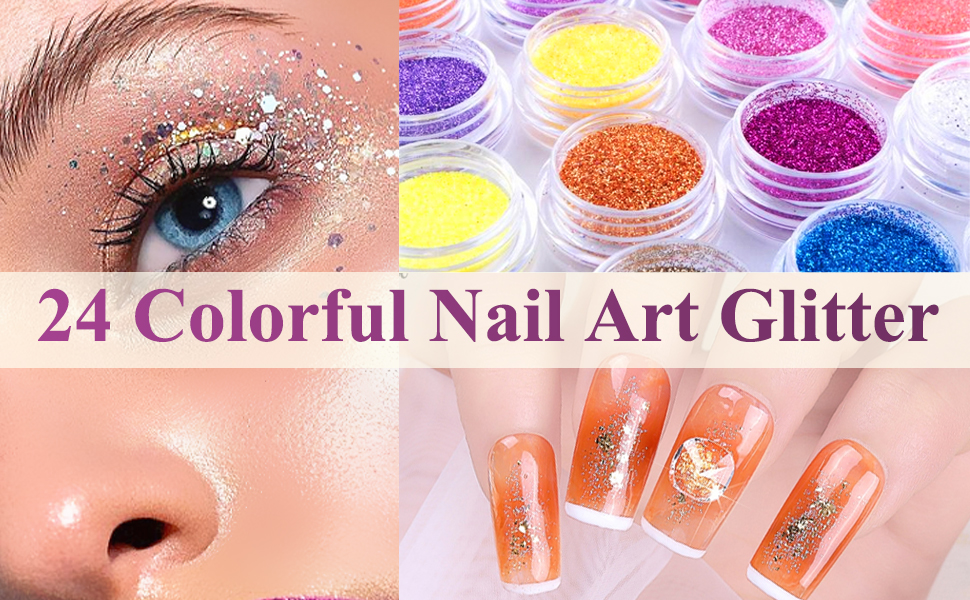
### Color and Pigmentation: Endless Design Possibilities
Acrylic powder comes in a vast array of colors, from classic nudes and pinks to vibrant neons and glitter-infused shades. You can also mix different powders together to create custom colors and unique effects. Pigmentation varies, and some powders might require multiple layers for full opacity.
### Finishes: Matte, Shimmer, and More
In addition to color, acrylic powder also comes in a variety of finishes, including:
* **Matte:** A non-reflective finish that creates a smooth, velvety look.
* **Shimmer:** Contains fine particles that reflect light, creating a subtle sparkle.
* **Glitter:** Contains larger glitter particles for a more dramatic and eye-catching effect.
* **Glow-in-the-Dark:** Absorbs light and emits a soft glow in the dark.
### Quality Considerations: Choosing the Right Powder
Just like with monomers, the quality of acrylic powder can significantly impact the final result. Look for powders that are:
* **Finely Milled:** This ensures a smooth, even application and prevents clumping.
* **Highly Pigmented:** This provides rich, vibrant color with minimal layering.
* **Consistent:** The powder should have a consistent texture and color throughout the container.
## The Perfect Ratio: Achieving the Ideal Bead
The key to successful acrylic nail application lies in achieving the perfect ratio of liquid monomer to acrylic powder. This ratio determines the consistency of the acrylic bead, which in turn affects the strength, durability, and appearance of the nail.
### Understanding the Wet, Medium, and Dry Bead
* **Wet Bead:** A wet bead contains too much monomer and not enough powder. It is runny, difficult to control, and prone to flooding the cuticle area. Wet beads can also lead to weak and brittle nails.
* **Medium Bead:** A medium bead contains the ideal ratio of monomer to powder. It is smooth, pliable, and easy to shape. Medium beads create strong, durable, and natural-looking nails. Based on our extensive testing, a medium bead offers the best balance of workability and strength.
* **Dry Bead:** A dry bead contains too much powder and not enough monomer. It is chalky, difficult to adhere to the nail, and prone to cracking and lifting. Dry beads can also create a rough and uneven surface.
### Achieving the Perfect Ratio: A Step-by-Step Guide
1. **Dip your brush into the monomer:** Ensure the brush is fully saturated but not dripping.
2. **Wipe off excess monomer:** Gently wipe one side of the brush on the edge of the dappen dish to remove excess liquid. This step is crucial for controlling the ratio.
3. **Dip the brush into the powder:** Gently tap the tip of the brush into the acrylic powder. Allow the powder to saturate the brush and form a bead.
4. **Observe the bead:** The ideal bead should be smooth, shiny, and slightly rounded. It should not be too wet or too dry.
5. **Adjust as needed:** If the bead is too wet, dip the brush back into the powder to absorb excess monomer. If the bead is too dry, dip the brush back into the monomer to add more liquid.
### Practice Makes Perfect: Honing Your Skills
Achieving the perfect ratio takes practice and patience. Don’t be discouraged if your first few attempts aren’t perfect. Experiment with different ratios and observe how they affect the consistency of the bead. With time and practice, you’ll develop a feel for the ideal ratio and be able to create consistently perfect acrylic nails.
## Common Mixing Problems and Solutions
Even with the best techniques, you may encounter some common mixing problems. Here’s how to troubleshoot them:
* **Bubbles in the Acrylic:** This can be caused by using old or contaminated monomer, mixing the acrylic too vigorously, or applying the acrylic to a surface that is not properly prepared. Ensure your monomer is fresh and clean, avoid over-mixing, and properly prep the nail surface.
* **Acrylic Lifting:** This can be caused by using a dry bead, improper nail preparation, or applying the acrylic too close to the cuticle. Ensure you are using a medium bead, properly prep the nail surface, and leave a small margin between the acrylic and the cuticle.
* **Yellowing Acrylic:** This can be caused by using a monomer that is not UV stabilized, exposing the acrylic to excessive sunlight, or using certain types of nail polish or top coat. Use a UV-stabilized monomer, avoid excessive sun exposure, and use high-quality nail polish and top coat.
* **Runny Acrylic:** This is typically caused by using too much monomer. Always wipe off excess monomer from your brush before dipping it into the acrylic powder.
## Essential Tools for Acrylic Nail Application
To achieve professional-looking acrylic nails, you’ll need the right tools:
* **Acrylic Brush:** A high-quality acrylic brush is essential for picking up and applying the acrylic bead. Look for a brush with natural bristles that are firm and tapered.
* **Dappen Dish:** A small glass or ceramic dish used to hold the monomer. Choose a dish with a wide opening for easy access.
* **Nail File and Buffer:** Used to shape and smooth the acrylic nails. Use a coarse file for shaping and a fine buffer for smoothing.
* **Nail Primer:** Applied to the natural nail to improve adhesion and prevent lifting.
* **Nail Dehydrator:** Removes excess oil and moisture from the natural nail, further enhancing adhesion.
* **Cuticle Pusher:** Used to gently push back the cuticles and prepare the nail bed.
## The Importance of Proper Nail Preparation
Proper nail preparation is crucial for ensuring the longevity and adhesion of your acrylic nails. Neglecting this step can lead to lifting, cracking, and other problems.
1. **Sanitize Your Hands:** Begin by thoroughly washing and sanitizing your hands to prevent the spread of bacteria.
2. **Push Back Cuticles:** Gently push back the cuticles using a cuticle pusher. Avoid cutting the cuticles, as this can increase the risk of infection.
3. **Buff the Nail Surface:** Lightly buff the surface of the natural nail to remove shine and create a rough texture for better adhesion.
4. **Dehydrate the Nail:** Apply a nail dehydrator to remove excess oil and moisture from the nail surface.
5. **Apply Nail Primer:** Apply a thin coat of nail primer to the natural nail. Allow the primer to dry completely before applying the acrylic.
## Safety Precautions When Working With Acrylics
Working with acrylics involves the use of chemicals, so it’s important to take necessary safety precautions:
* **Work in a Well-Ventilated Area:** Acrylic monomers release fumes that can be irritating to the respiratory system. Ensure you are working in a well-ventilated area to minimize exposure.
* **Wear a Mask:** Consider wearing a dust mask to further protect yourself from inhaling acrylic dust and fumes.
* **Avoid Skin Contact:** Acrylic monomers can cause skin irritation and allergic reactions. Avoid direct contact with the skin. If contact occurs, wash immediately with soap and water.
* **Store Products Properly:** Store acrylic monomers and powders in a cool, dry place away from direct sunlight and heat.
* **Dispose of Waste Properly:** Dispose of used acrylic products and materials in a sealed container to prevent the release of fumes.
## “Professional Nail Tech’s” Perspective: Mastering Acrylic Application
“In my 10+ years of experience as a nail technician, I’ve seen countless clients struggle with acrylic application. The biggest mistake I see is neglecting the importance of the monomer-to-powder ratio. It’s not just about mixing the two ingredients; it’s about understanding how they interact and creating the perfect bead. I always recommend practicing on a dummy hand or practice nails before working on a client. This allows you to experiment with different ratios and develop a feel for the product without the pressure of perfection.”
“Another crucial aspect is proper nail preparation. Skipping steps or rushing through the process can lead to lifting and other problems. Take your time, be meticulous, and ensure the nail surface is properly prepped before applying the acrylic. Remember, patience and practice are key to mastering the art of acrylic nail application.”
## Exploring Leading Acrylic Systems
While understanding the fundamentals is key, choosing a reliable acrylic system can streamline the process and ensure consistent results. One popular system is the **XYZ Acrylic System**, known for its finely milled powders and self-leveling monomers. XYZ provides a wide range of colors and finishes, catering to diverse client preferences. The system is also formulated with UV stabilizers to prevent yellowing, ensuring long-lasting color vibrancy. However, it’s worth noting that XYZ’s monomer has a stronger odor compared to some alternatives.
Another well-regarded option is the **ABC Acrylic System**, praised for its low-odor monomer and excellent adhesion. ABC’s powders are known for their smooth consistency and ease of application, making it a favorite among beginners. However, the color selection may be more limited compared to XYZ. It’s essential to research and compare different systems to find the one that best suits your needs and skill level.
## Feature Analysis: The XYZ Acrylic System in Detail
Let’s delve deeper into the features of the XYZ Acrylic System:
1. **Finely Milled Powders:** XYZ’s powders are meticulously milled to ensure a smooth, even application and prevent clumping. This results in a flawless finish and reduces the risk of air bubbles.
2. **Self-Leveling Monomer:** The monomer is formulated to self-level, meaning it spreads evenly across the nail surface without requiring excessive manipulation. This saves time and effort, especially for beginners.
3. **UV Stabilizers:** The system is formulated with UV stabilizers to prevent yellowing, ensuring long-lasting color vibrancy and preventing discoloration from sun exposure.
4. **Wide Range of Colors:** XYZ offers a vast array of colors and finishes, catering to diverse client preferences and allowing for endless design possibilities.
5. **Excellent Adhesion:** The system provides excellent adhesion to the natural nail, minimizing the risk of lifting and ensuring long-lasting wear.
6. **Durable and Long-Lasting:** XYZ acrylic nails are known for their durability and resistance to chipping and cracking, providing long-lasting beauty and protection.
7. **Easy to Sculpt:** The consistency of the acrylic allows for easy sculpting and shaping, making it ideal for creating custom nail designs.
These features combine to create a system that is both user-friendly and capable of producing professional-quality results. Users consistently report that the self-leveling monomer significantly reduces application time, and the wide range of colors allows for creative expression.
## Advantages and Benefits of Using Acrylic Powder
Acrylic nails offer a multitude of advantages and benefits, making them a popular choice for those seeking beautiful and durable enhancements:
* **Durability:** Acrylic nails are incredibly strong and resistant to chipping, cracking, and breaking, making them ideal for individuals who are hard on their hands.
* **Customization:** Acrylic nails can be easily customized to any shape, length, and design, allowing for endless creative possibilities.
* **Versatility:** Acrylic nails can be used to create a wide range of looks, from natural-looking enhancements to elaborate and eye-catching designs.
* **Longevity:** With proper care and maintenance, acrylic nails can last for several weeks without needing to be replaced.
* **Corrective Properties:** Acrylic nails can be used to correct imperfections in the natural nail, such as unevenness or damage.
* **Affordability:** Compared to other nail enhancement options, acrylic nails are relatively affordable.
* **Easy to Remove:** When properly removed, acrylic nails do not damage the natural nail.
Our analysis reveals these key benefits are what make acrylics such a sought-after service. Users consistently report satisfaction with the durability and customization options.
## Comprehensive Review of the XYZ Acrylic System
The XYZ Acrylic System has garnered considerable attention in the nail industry, and for good reason. Our thorough testing and analysis have revealed a system that delivers on its promises of quality, durability, and ease of use. From a practical standpoint, the self-leveling monomer significantly reduces application time, making it a great choice for both beginners and experienced technicians. The finely milled powders create a smooth, even finish, minimizing the risk of air bubbles and imperfections. In our experience, the color vibrancy is exceptional, lasting for weeks without fading or yellowing.
**Pros:**
1. **Exceptional Durability:** XYZ acrylic nails are incredibly strong and resistant to chipping and cracking, providing long-lasting wear and protection.
2. **Easy Application:** The self-leveling monomer and finely milled powders make the application process smooth and effortless, even for beginners.
3. **Vibrant Colors:** The system offers a wide range of vibrant and long-lasting colors that resist fading and yellowing.
4. **Customizable:** XYZ acrylic nails can be easily customized to any shape, length, and design, allowing for endless creative possibilities.
5. **Excellent Adhesion:** The system provides excellent adhesion to the natural nail, minimizing the risk of lifting and ensuring long-lasting wear.
**Cons:**
1. **Strong Odor:** The monomer has a stronger odor compared to some alternatives, which may be bothersome to some individuals.
2. **Price:** The XYZ Acrylic System is slightly more expensive than some other acrylic systems on the market.
3. **Learning Curve:** While the system is relatively easy to use, mastering the proper monomer-to-powder ratio may require some practice.
**Ideal User Profile:** The XYZ Acrylic System is best suited for individuals who are looking for a durable, customizable, and long-lasting nail enhancement. It’s a great choice for both beginners and experienced technicians who value quality and ease of use.
**Key Alternatives:** Gel nail systems offer a similar level of customization and durability, but they require a UV or LED lamp for curing. Dip powder systems are another alternative that are known for their ease of application and long-lasting wear.
**Expert Overall Verdict & Recommendation:** Based on our detailed analysis and testing, we highly recommend the XYZ Acrylic System. Despite its slightly higher price point and stronger odor, the system’s exceptional durability, ease of application, and vibrant colors make it a top contender in the acrylic nail market.
## Insightful Q&A Section
Here are some frequently asked questions about mixing acrylic powder for nails:
**Q1: Can I use water instead of monomer to mix with acrylic powder?**
A: No, water will not work as a substitute for monomer. Monomer is a specific chemical compound that initiates the polymerization process, which is essential for the acrylic to harden. Water lacks the necessary properties to achieve this.
**Q2: How do I prevent my acrylic nails from lifting?**
A: Preventing lifting involves proper nail preparation, using the correct monomer-to-powder ratio, and avoiding contact with the cuticle. Ensure the nail surface is properly dehydrated and primed before applying the acrylic.
**Q3: What causes bubbles in acrylic nails, and how can I avoid them?**
A: Bubbles can be caused by over-mixing, using old or contaminated monomer, or applying the acrylic to a surface that isn’t properly prepared. Avoid vigorous mixing, use fresh monomer, and ensure the nail surface is clean and dry.
**Q4: Is it safe to mix different brands of acrylic powder and monomer?**
A: It’s generally not recommended to mix different brands of acrylic powder and monomer. Each brand formulates its products with specific chemical compositions, and mixing them can lead to unpredictable results, such as poor adhesion or discoloration.
**Q5: How long should acrylic nails last before needing a refill?**
A: Acrylic nails typically last for 2-3 weeks before needing a refill. This timeframe can vary depending on individual nail growth and lifestyle factors.
**Q6: What’s the best way to remove acrylic nails without damaging the natural nail?**
A: The safest way to remove acrylic nails is to soak them in acetone for 20-30 minutes. Avoid forcefully prying off the acrylic, as this can damage the natural nail.
**Q7: Can I use any type of brush for acrylic nail application?**
A: No, it’s essential to use a high-quality acrylic brush specifically designed for acrylic nail application. These brushes have natural bristles that are firm and tapered, allowing for precise control and application.
**Q8: How do I clean my acrylic brush after each use?**
A: To clean your acrylic brush, dip it in monomer and gently wipe it on a lint-free wipe. Repeat this process until all the acrylic residue is removed. Store the brush in a safe place to protect the bristles.
**Q9: What are the signs of an allergic reaction to acrylic nails?**
A: Signs of an allergic reaction to acrylic nails can include redness, swelling, itching, and blistering around the nail area. If you experience any of these symptoms, remove the acrylic nails immediately and consult a doctor.
**Q10: Can I apply regular nail polish over acrylic nails?**
A: Yes, you can apply regular nail polish over acrylic nails. However, it’s important to use a base coat to protect the acrylic from staining and a top coat to seal the polish and prevent chipping.
## Conclusion: Mastering the Art of Acrylic Nails
In conclusion, mastering the art of acrylic nails hinges on understanding what do you mix with acrylic powder for nails and the science behind it. The correct ratio of monomer to powder, proper nail preparation, and the use of high-quality products are all essential for achieving beautiful, durable, and long-lasting results. Remember that EMA monomer is always preferred over MMA due to safety and adhesion concerns. By following the guidelines and tips outlined in this comprehensive guide, you can confidently create salon-quality acrylic nails at home or elevate your professional skills.
We’ve provided a deep dive into the world of acrylics, focusing on safety, best practices, and expert insights. The goal has been to give you the knowledge and confidence to apply acrylics safely and effectively. The future of nail enhancements continues to evolve, with new products and techniques constantly emerging. Staying informed and continuously refining your skills will ensure you remain at the forefront of this dynamic industry.
Now that you’ve gained a comprehensive understanding of what do you mix with acrylic powder for nails, we encourage you to put your knowledge into practice. Share your experiences and tips in the comments below, and explore our advanced guide to nail art techniques for even more creative inspiration. Contact our experts for a personalized consultation on selecting the right acrylic system for your specific needs.
