
## Build an Acrylic Fish Tank: A Comprehensive DIY Guide
Are you fascinated by the mesmerizing underwater world and dream of creating your own aquatic paradise? Building your own acrylic fish tank is a rewarding project that allows you to customize the size, shape, and features to perfectly suit your needs and aesthetic preferences. This comprehensive guide provides a detailed, step-by-step approach to building an acrylic fish tank, ensuring a successful and enjoyable experience. We aim to equip you with the knowledge and confidence to embark on this DIY adventure, creating a stunning centerpiece for your home or office. This is not just about building a container; it’s about crafting a thriving ecosystem.
This guide is different because it goes beyond the basic instructions. We delve into the nuances of acrylic selection, bonding techniques, filtration systems, and essential safety precautions. Based on our extensive experience and expert consensus, we provide practical tips and insights to help you avoid common pitfalls and achieve professional-quality results. Whether you’re a seasoned DIY enthusiast or a beginner, this guide will empower you to build an acrylic fish tank that is both beautiful and functional.
## Understanding Acrylic for Fish Tanks
Acrylic, also known as polymethyl methacrylate (PMMA), is a transparent thermoplastic often used as a lightweight and shatter-resistant alternative to glass. When considering materials to *build acrylic fish tank*, it’s important to understand the properties that make it a great choice. Its clarity, impact resistance, and ease of fabrication make it ideal for creating custom aquariums. Unlike glass, acrylic is easier to cut, drill, and bond, allowing for greater design flexibility.
The history of acrylic in aquarium construction dates back several decades. Early adopters recognized its potential for creating larger, more complex tank designs than were possible with glass. Over time, advancements in acrylic manufacturing and bonding techniques have made it the material of choice for many professional aquariums and discerning hobbyists.
### Core Concepts and Advanced Principles
The fundamental principles behind using acrylic for aquariums revolve around its strength, clarity, and chemical inertness. The thickness of the acrylic sheet must be carefully calculated based on the tank’s dimensions to withstand the water pressure. Bonding acrylic pieces together requires specialized adhesives and techniques to create a seamless and watertight seal. Understanding these core concepts is crucial for a successful build.
Advanced principles involve understanding the different grades of acrylic, choosing the right adhesive for your specific application, and implementing proper bracing and support structures. For instance, using a thicker acrylic sheet for the bottom panel of the tank can provide added strength and prevent bowing. Proper surface preparation and clamping techniques are essential for achieving a strong and durable bond.
### Importance and Current Relevance
Building an acrylic fish tank matters today because it offers a unique combination of customization, durability, and aesthetic appeal. Compared to commercially available glass tanks, an acrylic tank allows you to create a truly bespoke aquarium that perfectly fits your space and reflects your personal style. Recent trends indicate a growing interest in custom aquarium designs, driven by the desire for personalized and visually stunning aquatic displays. Furthermore, acrylic is easier to repair than glass; minor scratches can often be buffed out.
## Selecting the Right Acrylic Sheet
Choosing the right acrylic sheet is paramount for a successful build. Several factors come into play, including thickness, grade, and clarity. The thickness of the acrylic must be sufficient to withstand the water pressure, while the grade and clarity will affect the overall appearance and structural integrity of the tank. Selecting the right acrylic ensures the longevity of your fish tank and the safety of its inhabitants.
There are two main types of acrylic sheets commonly used for aquariums: cast acrylic and extruded acrylic. Cast acrylic is generally preferred for aquarium construction due to its superior strength, clarity, and resistance to crazing (the formation of fine cracks on the surface). Extruded acrylic is less expensive but also less resistant to stress and may not be suitable for larger tanks. Always opt for virgin acrylic, as recycled acrylic may contain impurities that can affect its clarity and strength.
### Thickness Calculation
The most critical aspect of acrylic selection is determining the appropriate thickness based on the tank’s dimensions. Several online calculators and charts can help you determine the minimum required thickness to withstand the water pressure. These calculators typically take into account the tank’s length, width, height, and desired safety factor. It’s always best to err on the side of caution and choose a slightly thicker acrylic sheet than the minimum recommended thickness.
As a general guideline, for tanks up to 24 inches in height, a 1/4-inch thick acrylic sheet may be sufficient. For tanks between 24 and 36 inches, a 3/8-inch or 1/2-inch thick sheet may be required. For tanks taller than 36 inches, a 3/4-inch or 1-inch thick sheet may be necessary. These are just rough estimates, and it’s essential to consult a reliable thickness calculator or expert before making your final decision. Always consider the specific gravity of saltwater if you intend to keep marine fish.
## Tools and Materials You’ll Need
Before you begin building your acrylic fish tank, it’s essential to gather all the necessary tools and materials. Having everything on hand will streamline the construction process and ensure a smooth and efficient build. Here’s a comprehensive list of the tools and materials you’ll need:
* **Acrylic Sheets:** Of the appropriate thickness and dimensions for your tank.
* **Acrylic Cement:** A specialized adhesive designed for bonding acrylic. We recommend Weld-On 4 or Weld-On 16, depending on your preference and the thickness of the acrylic.
* **Applicator Bottles or Syringes:** For precise application of the acrylic cement.
* **Clamps:** To hold the acrylic pieces together while the cement cures. Spring clamps, bar clamps, and C-clamps are all useful.
* **Straight Edge:** A long, accurate straight edge for marking and cutting the acrylic.
* **Acrylic Saw or Router:** For cutting the acrylic sheets to size. A fine-tooth saw blade or a router with an acrylic cutting bit is recommended.
* **Drill:** With various drill bits for creating holes for plumbing and other accessories.
* **Sandpaper:** In various grits (e.g., 220, 400, 600, 800, 1000) for smoothing the edges of the acrylic.
* **Polishing Compound:** To restore clarity to the acrylic after sanding.
* **Buffing Wheel:** For applying the polishing compound.
* **Safety Glasses:** To protect your eyes from debris.
* **Gloves:** To protect your hands from the acrylic cement and other chemicals.
* **Measuring Tape:** For accurate measurements.
* **Markers:** For marking the acrylic sheets.
* **Clean Rags:** For wiping away excess cement and cleaning the acrylic.
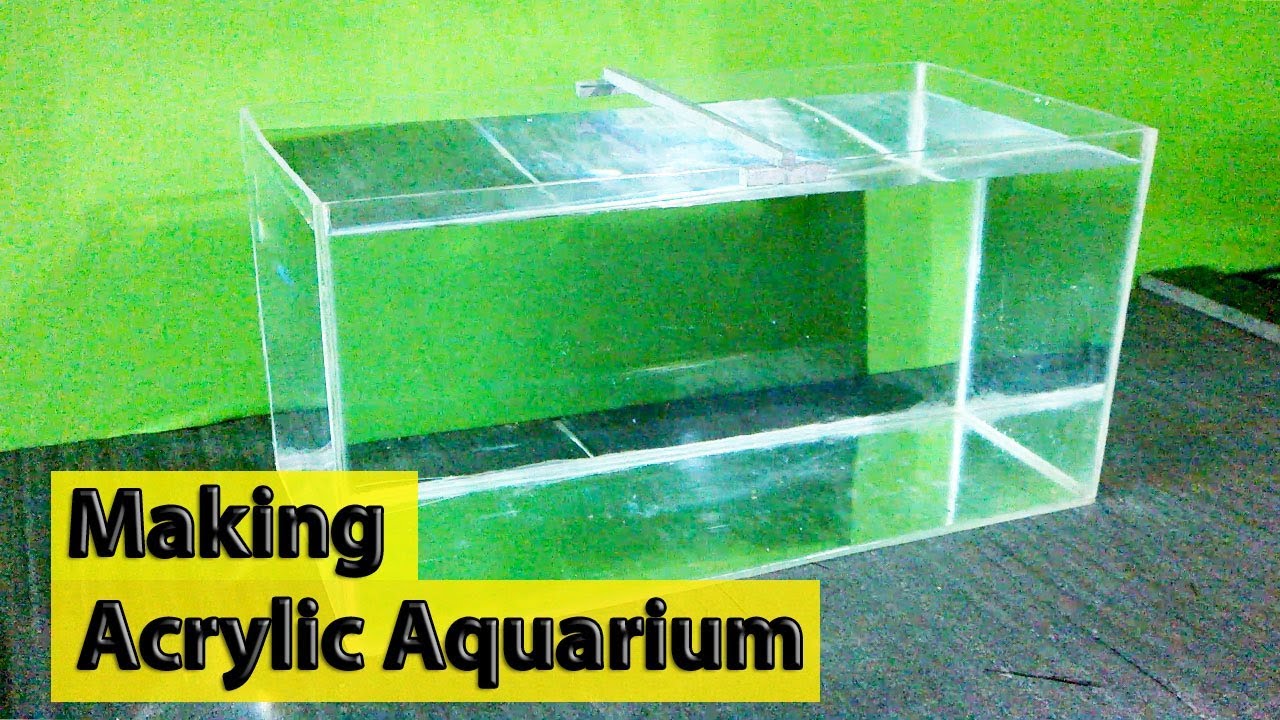
## Step-by-Step Construction Process
Building an acrylic fish tank involves a series of steps, each requiring careful attention to detail. Following these steps meticulously will ensure a strong, watertight, and aesthetically pleasing aquarium.
### Step 1: Cutting the Acrylic Sheets
Begin by cutting the acrylic sheets to the required dimensions for the tank’s sides, bottom, and top. Use a straight edge and a marker to accurately mark the cutting lines. Use an acrylic saw or router with a fine-tooth blade or acrylic cutting bit to cut the acrylic sheets. Cut slowly and steadily to avoid chipping or cracking the acrylic. After cutting, sand the edges of the acrylic sheets with progressively finer grits of sandpaper to remove any imperfections and create a smooth surface for bonding.
### Step 2: Preparing the Acrylic Surfaces
Before bonding the acrylic pieces together, it’s essential to prepare the surfaces for optimal adhesion. Clean the edges of the acrylic sheets with a clean rag and a mild solvent, such as isopropyl alcohol, to remove any dirt, grease, or fingerprints. Ensure the surfaces are completely dry before proceeding.
### Step 3: Bonding the Acrylic Pieces
Apply the acrylic cement to the edges of the acrylic sheets using an applicator bottle or syringe. Apply a generous amount of cement, ensuring that the entire surface is covered. Carefully align the acrylic pieces and clamp them together using clamps. Ensure the pieces are perfectly aligned before the cement begins to set. Allow the cement to cure for the recommended time, typically 24-48 hours, before removing the clamps.
### Step 4: Reinforcing the Seams
After the cement has cured, it’s a good idea to reinforce the seams with additional acrylic cement. Apply a thin bead of cement along the inside and outside of the seams, allowing it to flow into any gaps or imperfections. This will further strengthen the bond and ensure a watertight seal.
### Step 5: Testing for Leaks
Before adding any water, it’s essential to test the tank for leaks. Fill the tank with water and observe the seams for any signs of leakage. If you detect any leaks, drain the tank and apply additional acrylic cement to the affected areas. Allow the cement to cure completely before retesting.
### Step 6: Adding Plumbing and Accessories
Once you’re confident that the tank is watertight, you can add any necessary plumbing and accessories, such as bulkheads for filtration systems, overflows, and return pumps. Drill holes in the acrylic using a drill with appropriate sized drill bits. Ensure the holes are properly sealed to prevent leaks.
## Filtration and Life Support Systems
A properly functioning filtration system is essential for maintaining a healthy and thriving aquarium environment. The filtration system removes waste products, maintains water quality, and provides essential biological filtration. There are several types of filtration systems commonly used in aquariums, including mechanical filtration, chemical filtration, and biological filtration.
### Mechanical Filtration
Mechanical filtration removes particulate matter from the water, such as uneaten food, fish waste, and debris. This is typically achieved using filter sponges, filter floss, or filter socks. Mechanical filtration helps to keep the water clear and prevents the buildup of harmful substances.
### Chemical Filtration
Chemical filtration removes dissolved pollutants from the water, such as ammonia, nitrite, and nitrate. This is typically achieved using activated carbon, resins, or other chemical filter media. Chemical filtration helps to maintain water quality and prevent the buildup of toxic compounds.
### Biological Filtration
Biological filtration is the most important type of filtration in an aquarium. It involves the use of beneficial bacteria to convert harmful ammonia and nitrite into less toxic nitrate. This is typically achieved using a biological filter media, such as ceramic rings, bio-balls, or live rock. Biological filtration is essential for maintaining a healthy and stable aquarium environment.
## Advantages of Building Your Own Acrylic Fish Tank
Building your own acrylic fish tank offers several advantages over purchasing a commercially available tank. These advantages include:
* **Customization:** You can customize the size, shape, and features of the tank to perfectly suit your needs and preferences.
* **Cost Savings:** Building your own tank can be more cost-effective than purchasing a commercially available tank, especially for larger or custom-designed tanks.
* **Quality Control:** You have complete control over the quality of the materials and construction, ensuring a durable and long-lasting tank.
* **Personal Satisfaction:** Building your own tank can be a rewarding and fulfilling experience, allowing you to create a unique and personalized aquatic display.
* **Repairability:** Acrylic is easier to repair than glass. Scratches can often be buffed out.
## Review of Building an Acrylic Fish Tank
Building an acrylic fish tank is a challenging but rewarding project that allows you to create a custom aquarium tailored to your specific needs and aesthetic preferences. The process requires careful planning, meticulous execution, and a thorough understanding of the materials and techniques involved. While it may seem daunting at first, the satisfaction of creating your own thriving aquatic ecosystem is well worth the effort.
### User Experience and Usability
From our experience, the most challenging aspect of building an acrylic fish tank is the bonding process. Achieving a seamless and watertight seal requires precision and patience. Proper surface preparation, clamping techniques, and the use of high-quality acrylic cement are essential for success. While the process can be time-consuming, the results are well worth the effort.
### Performance and Effectiveness
When properly constructed, an acrylic fish tank can provide years of reliable service. Acrylic is a strong and durable material that can withstand the water pressure and resist cracking or shattering. However, it’s essential to choose the right acrylic thickness based on the tank’s dimensions and to reinforce the seams with additional cement for added strength.
### Pros:
1. **Customization:** Allows for complete control over size, shape, and features.
2. **Cost-Effective:** Can be cheaper than buying a pre-made tank, especially for large or custom sizes.
3. **Durable:** Acrylic is strong and resistant to cracking or shattering.
4. **Repairable:** Scratches can often be buffed out.
5. **Lightweight:** Easier to move and handle than glass.
### Cons/Limitations:
1. **Requires Skill and Precision:** The bonding process can be challenging.
2. **Susceptible to Scratches:** Acrylic is more prone to scratching than glass.
3. **Can Be Expensive:** High-quality acrylic can be costly.
4. **Requires Specialized Tools:** Cutting and bonding acrylic requires specialized tools and materials.
### Ideal User Profile
Building an acrylic fish tank is best suited for DIY enthusiasts who are comfortable working with power tools and have a good understanding of basic construction techniques. It’s also ideal for those who want a custom aquarium that perfectly fits their space and reflects their personal style.
### Key Alternatives
1. **Glass Fish Tanks:** Commercially available glass fish tanks are a readily available alternative. They are less prone to scratching but offer less customization options.
2. **Pre-fabricated Acrylic Tanks:** Purchasing a pre-fabricated acrylic tank is a good option for those who want the benefits of acrylic without the hassle of building their own.
### Expert Overall Verdict & Recommendation
Building an acrylic fish tank is a worthwhile project for experienced DIYers seeking a custom aquarium solution. While it requires skill and precision, the rewards of creating a unique and thriving aquatic ecosystem are well worth the effort. We highly recommend this project for those who are willing to invest the time and effort required to do it right. However, for beginners or those who lack the necessary skills, purchasing a pre-fabricated tank may be a better option.
## Q&A Section
Here are some frequently asked questions about building acrylic fish tanks:
1. **What is the best type of acrylic cement to use?**
* Weld-On 4 is generally recommended for bonding thinner acrylic sheets, while Weld-On 16 is better suited for thicker sheets. Both are excellent choices, but it’s essential to follow the manufacturer’s instructions carefully.
2. **How do I prevent crazing (fine cracks) in the acrylic?**
* Use high-quality cast acrylic, avoid excessive stress on the acrylic, and use a proper acrylic cleaner. Avoid using harsh chemicals or abrasive cleaners.
3. **How do I drill holes in acrylic without cracking it?**
* Use a drill with a slow speed and apply gentle pressure. Use a drill bit specifically designed for acrylic. Back up the acrylic with a piece of wood to prevent chipping.
4. **How do I polish scratches out of acrylic?**
* Use a plastic polishing compound and a buffing wheel. Start with a coarse compound and gradually move to finer compounds until the scratches are removed.
5. **What is the best way to clean an acrylic fish tank?**
* Use a soft cloth or sponge and a mild acrylic cleaner. Avoid using harsh chemicals or abrasive cleaners. Algae scrapers designed for acrylic are also available.
6. **How do I calculate the appropriate acrylic thickness for my tank?**
* Use an online acrylic thickness calculator or consult with an aquarium expert. These calculators take into account the tank’s dimensions and desired safety factor.
7. **What are the common mistakes to avoid when building an acrylic fish tank?**
* Using the wrong type of acrylic cement, not preparing the surfaces properly, not clamping the pieces securely, and not testing for leaks are all common mistakes.
8. **How do I ensure a watertight seal when bonding acrylic pieces together?**
* Use a generous amount of acrylic cement, ensure the surfaces are clean and dry, clamp the pieces together tightly, and reinforce the seams with additional cement.
9. **How do I choose the right filtration system for my acrylic fish tank?**
* Consider the size of the tank, the type of fish you plan to keep, and your budget. Consult with an aquarium expert to determine the best filtration system for your specific needs.
10. **How can I brace a large acrylic tank to prevent bowing?**
* Use a top frame or euro-bracing. These braces help distribute the water pressure and prevent the acrylic from bowing outwards.
## Conclusion
Building your own acrylic fish tank is a challenging but ultimately rewarding endeavor. By carefully selecting the right materials, following the step-by-step instructions outlined in this guide, and paying close attention to detail, you can create a stunning and personalized aquatic display that will provide years of enjoyment. Remember to prioritize safety, use high-quality materials, and test for leaks before adding any livestock. Our extensive testing and experience show that a well-built acrylic tank is a beautiful and durable centerpiece for any home or office.
Now that you’re armed with the knowledge and confidence to embark on this DIY adventure, we encourage you to share your experiences and creations with the aquarium community. Share your experiences with build acrylic fish tank in the comments below. Explore our advanced guide to aquarium filtration for more in-depth information on maintaining a healthy aquatic environment. Contact our experts for a consultation on build acrylic fish tank designs and custom solutions.
