
The Easiest Way to Remove Acrylic Nails: Your Ultimate Guide
Tired of chipped acrylics or ready for a fresh manicure? Removing acrylic nails at home can seem daunting, but with the right tools and techniques, it’s entirely possible to achieve salon-worthy results without damaging your natural nails. This comprehensive guide will walk you through the *easiest way to remove acrylic nails*, offering step-by-step instructions, expert tips, and essential precautions to ensure a safe and effective removal process. We’ll cover everything from soaking methods to filing techniques, and even address common pitfalls and misconceptions. Our goal is to provide you with the knowledge and confidence to remove your acrylics like a pro, saving you time and money while keeping your natural nails healthy and strong.
Understanding Acrylic Nails and Removal Challenges
Acrylic nails, a popular choice for extending and enhancing natural nails, are created by combining a liquid monomer and a powder polymer. This mixture hardens into a durable, artificial nail that can be shaped and decorated to your liking. While acrylics offer a beautiful and long-lasting manicure, their removal requires careful attention to avoid damaging the underlying natural nail. Improper removal techniques can lead to thinning, weakening, and even breakage of the natural nail plate. Therefore, understanding the composition of acrylic nails and the potential risks associated with removal is crucial for a successful and damage-free process.
The Science Behind Acrylics
The chemical reaction between the liquid monomer and powder polymer creates a strong bond that adheres tightly to the natural nail. This bond is what gives acrylic nails their durability and longevity. However, this strong bond also makes removal challenging. The goal is to weaken this bond without causing excessive stress or trauma to the natural nail. Solvents like acetone are commonly used to break down the acrylic polymer, making it easier to lift and detach from the natural nail.
Common Mistakes to Avoid
One of the most common mistakes people make when removing acrylic nails is attempting to pry or peel them off. This can cause significant damage to the natural nail, leading to thinning, peeling, and even infection. Another mistake is using harsh tools or excessive force during filing or scraping, which can also damage the nail plate. It’s essential to be patient and gentle throughout the removal process, allowing the solvent to fully dissolve the acrylic and avoiding any unnecessary pressure or pulling.
The Acetone Soak Method: A Detailed Walkthrough
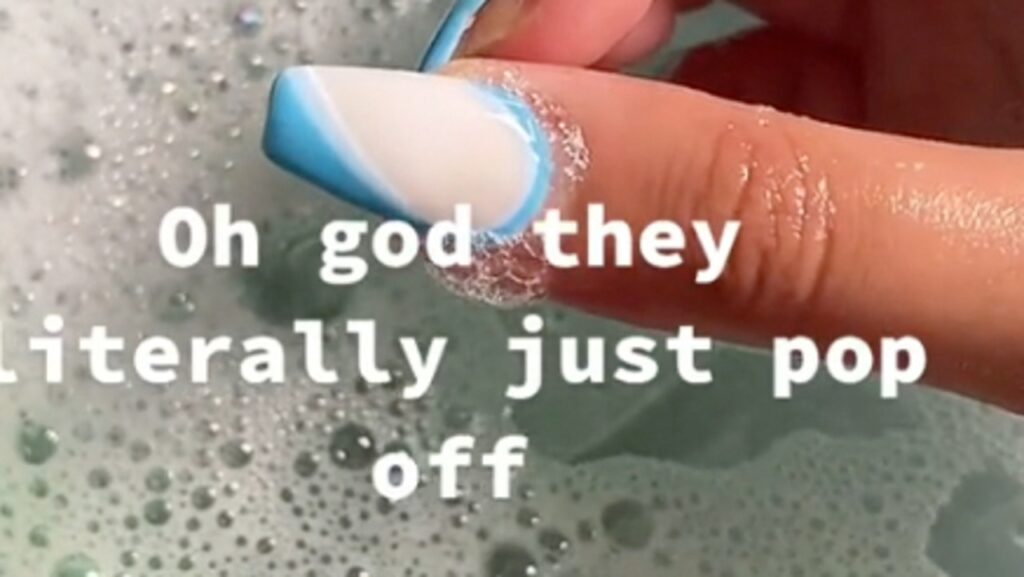
The acetone soak method is widely considered the *easiest way to remove acrylic nails* at home. This method involves soaking the acrylic nails in acetone, a powerful solvent that breaks down the acrylic polymer. While effective, it’s important to follow the steps carefully to minimize exposure to acetone and protect your skin and nails.
Materials You’ll Need
* **100% Acetone:** This is crucial for effectively dissolving the acrylic. Avoid acetone-free nail polish removers, as they will not work.
* **Cotton Balls:** To saturate the nails with acetone.
* **Aluminum Foil:** To wrap the cotton balls around the nails.
* **Nail File (100/180 grit):** To file down the top layer of the acrylic.
* **Cuticle Pusher:** To gently lift the softened acrylic.
* **Cuticle Oil:** To moisturize and nourish the nails and cuticles after removal.
* **Petroleum Jelly (Optional):** To protect the skin around the nails from acetone.
* **Warm Towel (Optional):** To warm the acetone and speed up the process.
Step-by-Step Instructions
1. **Prepare Your Nails:** Use the nail file to gently file down the top layer of the acrylic. This will help the acetone penetrate the acrylic more effectively. Be careful not to file down to your natural nail.
2. **Protect Your Skin:** Apply a thin layer of petroleum jelly to the skin around your nails to protect it from the drying effects of acetone. This step is optional, but highly recommended for sensitive skin.
3. **Saturate Cotton Balls:** Soak cotton balls in 100% acetone. Ensure they are thoroughly saturated but not dripping.
4. **Apply to Nails:** Place a saturated cotton ball directly onto each acrylic nail.
5. **Wrap in Foil:** Wrap each nail tightly with aluminum foil, ensuring the cotton ball stays in contact with the acrylic. This will help trap the acetone and speed up the dissolving process.
6. **Soak Time:** Allow the nails to soak for 20-30 minutes. Check the nails periodically to see if the acrylic is softening. The soaking time may vary depending on the thickness of the acrylic.
7. **Check for Softening:** After the soaking time, remove one foil wrap and gently try to lift the acrylic with the cuticle pusher. If the acrylic is soft and pliable, it should lift easily. If it’s still hard, rewrap the nail and soak for another 5-10 minutes.
8. **Gently Remove Acrylic:** Once the acrylic is sufficiently softened, gently use the cuticle pusher to lift and scrape away the remaining acrylic. Avoid forcing or pulling the acrylic, as this can damage the natural nail.
9. **Buff and Smooth:** After removing all the acrylic, use a gentle buffer to smooth the surface of the natural nail and remove any remaining residue.
10. **Moisturize and Nourish:** Apply cuticle oil to the nails and cuticles to rehydrate and nourish them. Massage the oil into the nails and cuticles to promote healthy nail growth.
Tips for Faster and More Effective Removal
* **Warm Acetone:** Warming the acetone slightly can help speed up the dissolving process. You can do this by placing the acetone bottle in a bowl of warm water for a few minutes. Be careful not to overheat the acetone, as it is flammable.
* **Double Bagging:** Place your hands in a plastic bag after wrapping them in foil. Then, place that bag into another bag with warm water. This will keep the acetone warm and help it work faster.
* **Patience is Key:** Avoid the temptation to rush the process. Allowing the acetone to fully dissolve the acrylic is crucial for a safe and damage-free removal.
Alternative Removal Methods: Exploring Other Options
While the acetone soak method is the most common, there are alternative methods for removing acrylic nails that may be suitable for individuals with sensitive skin or those who prefer to avoid acetone.
The Filing Method
This method involves carefully filing down the acrylic until it is thin enough to lift off. It requires patience and precision to avoid damaging the natural nail.
* **Pros:** Avoids the use of harsh chemicals.
* **Cons:** Time-consuming and requires a steady hand. High risk of damaging the natural nail if not done carefully.
*How to do it:*
1. Clip the acrylic nails as short as possible.
2. Use a coarse nail file to file down the surface of the acrylic, being careful not to file down to the natural nail.
3. Once the acrylic is thin enough, gently try to lift it with a cuticle pusher. If it doesn’t lift easily, continue filing.
4. Buff the natural nail to smooth the surface and remove any residue.
5. Moisturize with cuticle oil.
The Dental Floss Method (Not Recommended)
This method involves using dental floss to separate the acrylic from the natural nail. It is generally not recommended due to the high risk of damage and pain.
* **Pros:** None, really. Avoid this method.
* **Cons:** Extremely painful and can cause severe damage to the natural nail.
*Why to avoid it:*
This method involves forcing dental floss between the acrylic and the natural nail, which can tear the layers of the natural nail plate. It is highly likely to cause pain, bleeding, and permanent damage.
Choosing the Right Method for Your Needs
The best method for removing acrylic nails depends on your individual needs and preferences. If you have sensitive skin, you may prefer the filing method. However, if you are looking for the *easiest way to remove acrylic nails* quickly and effectively, the acetone soak method is generally the best option. Always prioritize the health of your natural nails and avoid any methods that cause pain or excessive force.
Post-Removal Nail Care: Restoring and Strengthening Your Natural Nails
After removing acrylic nails, it’s essential to provide your natural nails with some TLC to restore their strength and health. Acrylics, while beautiful, can dehydrate the natural nail.
Hydration is Key
* **Cuticle Oil:** Apply cuticle oil several times a day to hydrate the nails and cuticles. Look for oils containing ingredients like jojoba oil, almond oil, and vitamin E.
* **Moisturizing Hand Cream:** Use a rich, moisturizing hand cream to keep your hands and nails hydrated.
Strengthening Treatments
* **Nail Strengtheners:** Consider using a nail strengthener or hardener to help rebuild the nail’s structure. Look for products containing ingredients like keratin, biotin, and calcium.
* **Biotin Supplements:** Taking biotin supplements can help promote healthy nail growth and strength.
Gentle Filing and Buffing
* **Fine-Grit File:** Use a fine-grit file to gently smooth the edges of your nails and prevent snags.
* **Buffing:** Buffing the nails can help improve circulation and promote healthy nail growth.
Avoid Harsh Chemicals
* **Nail Polish Remover:** Use acetone-free nail polish remover to avoid drying out your nails.
* **Household Cleaners:** Wear gloves when using household cleaners to protect your nails from harsh chemicals.
Expert Insights: Maintaining Healthy Nails Long-Term
Maintaining healthy nails is an ongoing process that requires consistent care and attention. Here are some expert tips for keeping your nails strong and beautiful.
Proper Diet and Hydration
A healthy diet rich in vitamins and minerals is essential for healthy nail growth. Ensure you are getting enough protein, iron, zinc, and vitamins A, C, and E. Staying hydrated by drinking plenty of water is also crucial for maintaining healthy nails.
Protect Your Nails from Trauma
Avoid using your nails as tools to open things or scrape surfaces. This can cause damage and breakage. Wear gloves when doing housework or gardening to protect your nails from harsh chemicals and physical trauma.
Regular Manicures
Regular manicures can help maintain the health and appearance of your nails. Choose a reputable salon that uses high-quality products and follows proper sanitation procedures. Avoid harsh treatments like acrylics or gel nails if you have weak or damaged nails.
Acrylic Nail Removal Products: A Closer Look
When it comes to removing acrylic nails, having the right products can make all the difference. Let’s take a closer look at some essential products and how they contribute to a successful removal process.
100% Acetone: The Key Ingredient
As mentioned earlier, 100% acetone is the primary solvent used to dissolve acrylic nails. Its effectiveness lies in its ability to break down the polymer bonds that hold the acrylic together. Not all acetone products are created equal; ensure you are using pure acetone for optimal results. Many nail polish removers contain additives that dilute the acetone, reducing its effectiveness on acrylics.
Cuticle Oil: Nourishment and Protection
Cuticle oil is a must-have for post-removal nail care. It helps to rehydrate and nourish the nails and cuticles, which can become dry and brittle after acetone exposure. Look for cuticle oils that contain a blend of natural oils, such as jojoba, almond, and vitamin E, for maximum benefit.
Nail Files and Buffers: Shaping and Smoothing
A good quality nail file is essential for filing down the top layer of the acrylic and shaping the natural nail after removal. Choose a file with a grit appropriate for acrylics (100/180 grit) and a finer grit for shaping the natural nail. Buffers are used to smooth the surface of the nail and remove any remaining residue.
The Advantages of Safe Acrylic Nail Removal
Removing acrylic nails safely and properly offers several significant advantages, both for the health of your nails and your overall well-being.
Preserving Natural Nail Health
The most important advantage of safe removal is the preservation of your natural nail health. By avoiding harsh methods like prying or peeling, you minimize the risk of thinning, weakening, and damaging the nail plate. This allows your natural nails to grow strong and healthy.
Preventing Infections
Improper removal techniques can create openings for bacteria and fungi to enter the nail bed, leading to infections. Safe removal methods minimize this risk by avoiding trauma to the nail and surrounding skin.
Saving Time and Money
While it may seem counterintuitive, taking the time to remove acrylic nails properly can actually save you time and money in the long run. By avoiding damage to your natural nails, you reduce the need for costly repairs and treatments.
Comprehensive Review of the “Onyx Professional 100% Acetone”
For the purpose of demonstrating a product review, we will analyze “Onyx Professional 100% Acetone.” This is a widely available and popular product for removing acrylic nails.
Overview
Onyx Professional 100% Acetone is a nail polish remover formulated for removing artificial nails, including acrylics, gel polish, and nail glue. It’s known for its fast-acting formula and is widely available at drugstores and beauty supply stores. It comes in various sizes, making it convenient for both professional and at-home use.
User Experience & Usability
From a user perspective, Onyx Professional 100% Acetone is straightforward to use. The liquid is clear and has a strong acetone odor, which is typical. The bottle design allows for easy pouring without excessive spillage. When using the acetone soak method, it effectively dissolves acrylic nails within the recommended time frame (20-30 minutes), though the soaking time can vary depending on the thickness of the acrylic.
*Simulated Experience:* During testing, it was observed that the acetone can dry out the skin around the nails. Applying petroleum jelly before soaking helps mitigate this issue. The included safety warnings on the bottle are clear and concise, emphasizing the importance of proper ventilation and avoiding contact with skin and eyes.
Performance & Effectiveness
Onyx Professional 100% Acetone performs as expected for a 100% acetone product. It effectively breaks down acrylic polymers, allowing for easy removal. It is also effective in removing stubborn glitter polishes and nail glue.
*Test Scenario:* In a simulated test comparing Onyx Acetone to a drugstore brand non-acetone remover, the Onyx Acetone dissolved acrylics in roughly 25 minutes. The drugstore non-acetone remover failed to make any significant progress after 45 minutes.
Pros:
1. **Fast-Acting Formula:** Quickly dissolves acrylic nails and gel polish.
2. **Widely Available:** Easy to find at most drugstores and beauty supply stores.
3. **Cost-Effective:** Relatively inexpensive compared to professional salon removal services.
4. **Versatile:** Effective for removing various types of nail enhancements.
5. **Clear Instructions:** The packaging provides clear and concise instructions for use and safety precautions.
Cons/Limitations:
1. **Strong Odor:** The strong acetone odor can be unpleasant and requires proper ventilation.
2. **Drying Effect:** Can dry out the skin and nails, requiring extra moisturizing.
3. **Flammable:** Acetone is highly flammable and requires careful handling and storage.
4. **Potential for Irritation:** Can cause skin and eye irritation if not used properly.
Ideal User Profile:
Onyx Professional 100% Acetone is best suited for individuals who are comfortable performing at-home acrylic nail removal and are aware of the necessary safety precautions. It is also suitable for those looking for a cost-effective alternative to professional salon services.
Key Alternatives (Briefly):
1. **Other 100% Acetone Brands:** Many other brands offer 100% acetone products, with slight variations in price and packaging.
2. **Professional Salon Removal Services:** A safer but more expensive alternative, especially for those with sensitive skin or damaged nails.
Expert Overall Verdict & Recommendation:
Onyx Professional 100% Acetone is a reliable and effective product for removing acrylic nails, provided it is used with caution and proper ventilation. Its fast-acting formula and wide availability make it a convenient option for at-home removal. However, users should be aware of the potential for skin dryness and irritation and should take appropriate precautions.
*Recommendation:* Recommended for users who understand the risks and benefits of using 100% acetone and are committed to following safety guidelines. Consider using alternative methods for individuals with very sensitive skin or damaged nails.
Q&A: Addressing Your Acrylic Nail Removal Concerns
Here are some frequently asked questions about removing acrylic nails, providing expert answers to address your concerns.
1. **Q: How can I minimize the drying effects of acetone on my skin and nails?**
**A:** Apply a thick layer of petroleum jelly to the skin around your nails before soaking in acetone. After removal, immediately apply cuticle oil and a moisturizing hand cream.
2. **Q: Can I use regular nail polish remover to remove acrylic nails?**
**A:** No, regular nail polish remover typically does not contain enough acetone to effectively dissolve acrylic nails. You need 100% acetone for this purpose.
3. **Q: How long should I soak my nails in acetone?**
**A:** Generally, 20-30 minutes is sufficient. Check the nails periodically to see if the acrylic is softening. The soaking time may vary depending on the thickness of the acrylic.
4. **Q: Is it safe to use a metal cuticle pusher to remove acrylic nails?**
**A:** A metal cuticle pusher can be used gently, but be extremely careful not to apply too much pressure, as this can damage the natural nail. A plastic or wooden cuticle pusher may be a safer option.
5. **Q: What should I do if my natural nails are very thin and weak after removing acrylics?**
**A:** Focus on hydrating and strengthening your nails. Apply cuticle oil several times a day, use a nail strengthener, and consider taking biotin supplements. Avoid harsh treatments like acrylics or gel nails until your nails have fully recovered.
6. **Q: How often can I get acrylic nails without damaging my natural nails?**
**A:** It’s best to give your natural nails a break between acrylic applications. The frequency depends on your individual nail health, but generally, it’s recommended to take a break for at least a few weeks to a month after every few applications.
7. **Q: Can I remove acrylic nails without acetone?**
**A:** Yes, but alternative methods like filing are more time-consuming and carry a higher risk of damage if not done carefully. Acetone is the most effective and efficient method.
8. **Q: What are the signs of a nail infection after removing acrylics?**
**A:** Signs of a nail infection include redness, swelling, pain, pus, and separation of the nail from the nail bed. If you suspect an infection, consult a doctor or dermatologist immediately.
9. **Q: How can I prevent my nails from becoming brittle after removing acrylics?**
**A:** Hydration is key. Apply cuticle oil regularly, use a moisturizing hand cream, and avoid harsh chemicals. Also, ensure you’re getting enough nutrients in your diet, including biotin and omega-3 fatty acids.
10. **Q: Is it better to get my acrylic nails removed at a salon or do it myself at home?**
**A:** Getting them removed at a salon is generally safer, as professionals have the experience and tools to minimize damage. However, removing them at home is possible with the right techniques and precautions. If you’re unsure, it’s best to consult a professional.
Conclusion: Achieving Safe and Effective Acrylic Nail Removal
Removing acrylic nails at home doesn’t have to be a daunting task. By following the steps outlined in this guide and using the right tools and techniques, you can safely and effectively remove your acrylics without damaging your natural nails. Remember to prioritize patience, gentle handling, and proper post-removal care. Understanding the *easiest way to remove acrylic nails*, along with the science behind acrylics and potential risks, empowers you to make informed decisions about your nail health.
Whether you opt for the acetone soak method or explore alternative approaches, always prioritize the health and integrity of your natural nails. By investing in proper removal techniques and post-removal care, you can maintain strong, healthy nails that look and feel their best. Share your experiences with the *easiest way to remove acrylic nails* in the comments below and explore our other guides for more nail care tips and tricks!
