
## How to Put Acrylic Nails on Toes: A Comprehensive Guide to a Perfect Pedicure
Want to achieve salon-worthy toenails without the hefty price tag? Mastering how to put acrylic nails on toes is a fantastic way to enhance your pedicure game. This comprehensive guide will walk you through every step, from preparation to application and aftercare, ensuring a flawless and long-lasting finish. We’ll provide expert tips, troubleshoot common problems, and help you achieve professional-looking results right at home. This isn’t just a guide; it’s your roadmap to perfectly polished toes. We will cover everything you need to know about applying acrylic nails to your toes, including the necessary tools, step-by-step instructions, and essential tips for achieving a salon-quality finish.
### Why Acrylic Nails on Toes?
Acrylic nails on toes offer numerous benefits. They can enhance the appearance of your toes, providing a uniform and polished look. They’re also a great solution for covering imperfections like damaged or short nails. With proper application and care, acrylics can last for several weeks, giving you a long-lasting pedicure that’s perfect for vacations, special events, or simply maintaining a well-groomed appearance. Furthermore, acrylics provide a sturdy layer that can protect your natural toenails from breakage and damage. This is especially beneficial if you have brittle or weak nails that are prone to splitting or cracking.
## Understanding the Acrylic Nail System for Toes
Before diving into the application process, it’s crucial to understand the components of the acrylic nail system and how they work together. The system primarily consists of acrylic powder, liquid monomer, a primer, and a top coat. Each component plays a vital role in creating a durable and aesthetically pleasing acrylic nail.
### The Key Components
* **Acrylic Powder:** Available in various colors and finishes, acrylic powder provides the structure and strength of the nail. It’s mixed with the liquid monomer to create a workable paste.
* **Liquid Monomer:** This is the binding agent that activates the acrylic powder. When combined, they form a pliable mixture that hardens over time.
* **Nail Primer:** Applied to the natural nail, the primer prepares the surface for acrylic application by removing oils and creating a better bond. Acid-based primers are more effective but can be harsh, while acid-free primers are gentler.
* **Top Coat:** A final layer that seals and protects the acrylic, adding shine and preventing chipping. UV top coats require curing under a UV or LED lamp.
Understanding the function of each component ensures a more controlled and successful application process. Experimenting with different brands and formulations can also help you find the products that work best for your specific needs and preferences.
## Essential Tools and Materials for Acrylic Toenails
To successfully apply acrylic nails to your toes, you’ll need to gather the following tools and materials:
* **Acrylic Powder:** Choose a color that complements your skin tone or preferred nail polish.
* **Acrylic Liquid Monomer:** Essential for mixing with the acrylic powder to create the nail.
* **Nail Primer:** Ensures proper adhesion of the acrylic to your natural nail.
* **Top Coat:** Seals and protects the acrylic, adding shine.
* **Acrylic Nail Brush:** A high-quality brush is crucial for precise application. Look for one with firm bristles.
* **Dappen Dish:** A small glass or ceramic dish to hold the liquid monomer.
* **Nail File and Buffer:** For shaping and smoothing the acrylic.
* **Nail Clippers:** To trim your natural toenails.
* **Cuticle Pusher:** To gently push back the cuticles.
* **Dehydrator:** Removes excess oil from the nail surface.
* **Lint-Free Wipes:** For cleaning the nails and tools.
* **UV/LED Lamp (if using UV top coat):** For curing the top coat.
* **Toe Separators:** To prevent smudging while the acrylic dries.
* **Dust Mask:** Protects you from inhaling acrylic dust.
Having all these tools on hand will streamline the application process and ensure a professional finish. Invest in quality tools, as they can significantly impact the outcome and longevity of your acrylic toenails.
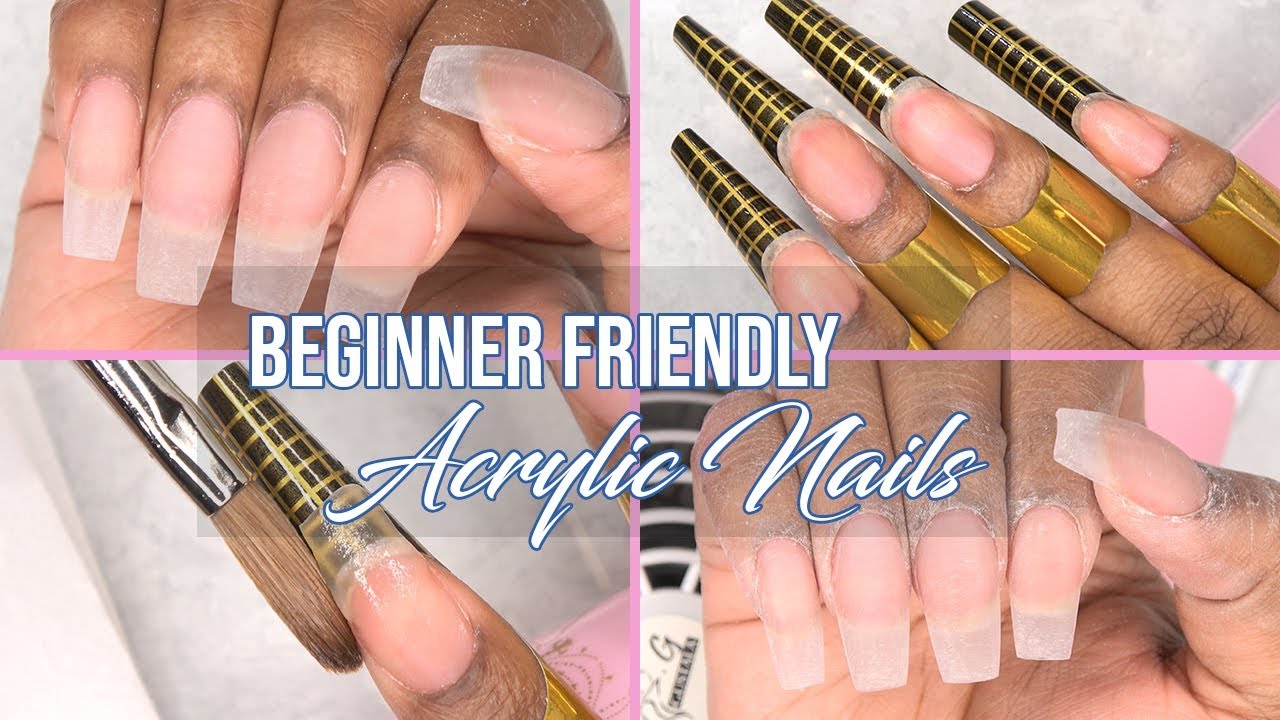
## Step-by-Step Guide: How to Put Acrylic Nails on Toes
Follow these detailed steps to achieve flawless acrylic toenails:
**Step 1: Preparation is Key**
* **Clean and Trim:** Start by thoroughly cleaning your feet and removing any existing nail polish. Trim your toenails to a manageable length and gently push back the cuticles using a cuticle pusher. This creates a clean and smooth canvas for the acrylic application.
* **Buff the Nail Surface:** Use a nail buffer to gently buff the surface of your natural nails. This removes the shine and creates a slightly rough texture, which helps the acrylic adhere better. Be careful not to over-buff, as this can weaken the nails.
* **Dehydrate the Nails:** Apply a nail dehydrator to remove any remaining oils and moisture from the nail surface. This is crucial for ensuring proper adhesion and preventing lifting.
* **Apply Nail Forms (Optional):** If you want to extend the length of your toenails, apply nail forms. These are adhesive stickers that attach to the edge of your natural nail and provide a guide for shaping the acrylic. This step is not always necessary but can be beneficial if you want a longer or more dramatic look.
**Step 2: Acrylic Application**
* **Prime Your Nails:** Apply a thin layer of nail primer to each toenail. Avoid getting primer on the skin, as it can cause irritation. Allow the primer to dry completely before proceeding.
* **Mix the Acrylic:** Pour a small amount of liquid monomer into a dappen dish. Dip your acrylic brush into the monomer, then gently tap it into the acrylic powder. The goal is to create a small bead of acrylic on the brush. The consistency should be similar to that of wet sand.
* **Apply the Acrylic:** Starting at the cuticle area, gently apply the acrylic bead to your toenail. Use the brush to spread the acrylic evenly over the nail surface. Work quickly, as the acrylic will start to harden relatively fast. If you are using nail forms, extend the acrylic over the form to create the desired length and shape.
* **Shape the Acrylic:** Use the acrylic brush to shape the acrylic while it is still pliable. Pay attention to the overall shape and thickness of the nail. Ensure that the acrylic is evenly distributed and that there are no lumps or bumps.
* **Repeat the Process:** Repeat steps 2-4 for each toenail. Work on one toe at a time to ensure that the acrylic doesn’t dry out before you have a chance to shape it.
**Step 3: Finishing Touches**
* **File and Shape:** Once the acrylic has completely hardened, use a nail file to refine the shape of your toenails. File the edges to create a smooth and even finish. Pay attention to the overall symmetry and balance of the nails.
* **Buff the Surface:** Use a nail buffer to smooth the surface of the acrylic. This will remove any scratches or imperfections and create a smooth base for the top coat.
* **Apply Top Coat:** Apply a thin layer of top coat to each toenail. If you are using a UV top coat, cure the nails under a UV/LED lamp according to the manufacturer’s instructions. This will seal the acrylic and add shine.
* **Clean Up:** Use a lint-free wipe to clean any excess product from the skin around your toenails. Apply cuticle oil to moisturize the skin and cuticles.
## Troubleshooting Common Issues
Even with careful application, you may encounter some common issues. Here’s how to troubleshoot them:
* **Lifting:** Lifting occurs when the acrylic separates from the natural nail. This can be caused by improper preparation, moisture, or oil on the nail surface. To prevent lifting, ensure that you thoroughly dehydrate and prime the nails before applying the acrylic.
* **Bubbles:** Bubbles in the acrylic can be caused by air trapped during the mixing process. To avoid bubbles, gently tap the brush into the acrylic powder and avoid overworking the mixture.
* **Uneven Application:** Uneven application can result in a lumpy or bumpy finish. To achieve a smooth and even application, work quickly and use a high-quality acrylic brush. Practice makes perfect, so don’t be discouraged if your first attempt isn’t perfect.
* **Yellowing:** Yellowing can occur if the acrylic is exposed to sunlight or certain chemicals. To prevent yellowing, use a high-quality top coat and avoid prolonged exposure to sunlight.
## Aftercare and Maintenance
Proper aftercare is essential for maintaining the longevity and appearance of your acrylic toenails. Here are some tips:
* **Moisturize Regularly:** Apply cuticle oil to your cuticles and the skin around your toenails daily. This will keep the skin hydrated and prevent dryness and cracking.
* **Avoid Harsh Chemicals:** Wear gloves when using harsh chemicals, such as cleaning products, to protect the acrylic from damage.
* **Protect Your Feet:** Wear comfortable shoes that provide adequate support and protection for your feet. Avoid wearing shoes that are too tight or that put excessive pressure on your toenails.
* **Schedule Regular Fill-Ins:** As your natural toenails grow, you will need to schedule regular fill-ins to maintain the appearance of your acrylics. Fill-ins involve adding acrylic to the new growth area to create a seamless transition.
* **Proper Removal:** When it’s time to remove your acrylics, avoid picking or prying them off, as this can damage your natural nails. Instead, soak your feet in acetone until the acrylic softens, then gently remove it with a cuticle pusher.
## Choosing the Right Products for Acrylic Toenails
Selecting the right products is crucial for achieving a professional-looking and long-lasting acrylic pedicure. Consider the following factors when choosing acrylic powders, liquids, primers, and top coats:
* **Acrylic Powder:** Look for a fine-milled acrylic powder that is easy to work with and provides good coverage. Consider the color and finish of the powder to match your desired look.
* **Liquid Monomer:** Choose a monomer that is specifically designed for acrylic nails and has a low odor. Some monomers contain UV inhibitors to prevent yellowing.
* **Nail Primer:** Decide between an acid-based or acid-free primer based on your nail sensitivity. Acid-based primers provide better adhesion but can be harsh on the skin.
* **Top Coat:** Opt for a high-quality top coat that provides a glossy finish and protects the acrylic from chipping and scratching. UV top coats require curing under a UV/LED lamp but offer superior durability.
## Exploring Different Acrylic Nail Designs for Toes
Once you’ve mastered the basic application process, you can explore different acrylic nail designs to enhance your pedicure. Here are some popular options:
* **Classic French Tips:** A timeless and elegant design that features a white tip on a nude or pink base.
* **Glitter Accents:** Add a touch of sparkle to your acrylics with glitter accents. You can apply glitter to the entire nail or create a gradient effect.
* **Ombre Nails:** Create a gradient effect by blending two or more colors seamlessly.
* **Nail Art:** Use nail art brushes and paints to create intricate designs, such as flowers, geometric patterns, or abstract art.
* **Rhinestones and Embellishments:** Add rhinestones, pearls, or other embellishments to your acrylics for a glamorous look.
## Safety Precautions When Applying Acrylic Nails on Toes
While applying acrylic nails can enhance your pedicure, it’s essential to take safety precautions to protect your health and well-being. Here are some guidelines:
* **Ventilation:** Work in a well-ventilated area to avoid inhaling acrylic fumes, which can cause respiratory irritation.
* **Dust Mask:** Wear a dust mask to prevent inhaling acrylic dust, which can also irritate the respiratory system.
* **Skin Protection:** Avoid getting acrylic products on your skin, as they can cause irritation or allergic reactions. Wear gloves if necessary.
* **Eye Protection:** Wear safety glasses to protect your eyes from splashes of acrylic products.
* **Proper Storage:** Store acrylic products in a cool, dry place away from heat and sunlight.
## Professional vs. DIY: Weighing the Options for Acrylic Toenails
Deciding whether to get acrylic toenails done professionally or to do them yourself depends on your budget, skill level, and time constraints. Here’s a comparison to help you make the right choice:
**Professional Acrylic Toenails:**
* **Pros:**
* Expert application and shaping.
* Access to high-quality products and equipment.
* Longer-lasting results.
* Relaxing and pampering experience.
* **Cons:**
* Higher cost.
* Requires scheduling appointments.
* May involve travel to a salon.
**DIY Acrylic Toenails:**
* **Pros:**
* Lower cost.
* Convenience of doing it at home.
* Flexibility to experiment with different designs.
* **Cons:**
* Requires practice and skill.
* May not achieve the same level of perfection as a professional.
* Requires purchasing your own tools and materials.
## How to Remove Acrylic Nails from Toes Safely
Removing acrylic nails properly is crucial to prevent damage to your natural nails. Here’s a step-by-step guide:
1. **Trim the Acrylics:** Use nail clippers to trim the length of the acrylic nails as much as possible.
2. **Buff the Surface:** Use a nail file to gently buff the surface of the acrylics. This will help the acetone penetrate the acrylic more effectively.
3. **Soak in Acetone:** Pour acetone into a small bowl or use cotton balls soaked in acetone. Place the cotton balls on your toenails and wrap them with foil to keep them in place. Alternatively, you can soak your feet directly in the bowl of acetone.
4. **Wait 20-30 Minutes:** Allow the acetone to soak for 20-30 minutes. This will soften the acrylics.
5. **Gently Remove:** Use a cuticle pusher to gently scrape off the softened acrylics. If the acrylics are still difficult to remove, soak them in acetone for a few more minutes.
6. **Moisturize:** After removing the acrylics, moisturize your feet and apply cuticle oil to your toenails. This will help to restore moisture and prevent dryness.
## The Future of Acrylic Toenails: Trends and Innovations
The world of acrylic toenails is constantly evolving, with new trends and innovations emerging regularly. Here are some exciting developments to watch out for:
* **3D Nail Art:** Advanced techniques are enabling intricate 3D designs on acrylic toenails, adding depth and dimension to pedicures.
* **Sustainable Acrylics:** Eco-conscious manufacturers are developing sustainable acrylic formulas made from plant-based or recycled materials.
* **Smart Nails:** Researchers are exploring the integration of microchips and sensors into acrylic nails for health monitoring and data collection.
* **Customizable Designs:** Advancements in printing technology are allowing for highly customizable acrylic nail designs, enabling personalized pedicures.
## Expert Insights and Tips for Perfect Acrylic Toenails
To achieve the best results when applying acrylic nails to your toes, consider these expert insights and tips:
* **Practice Makes Perfect:** Don’t be discouraged if your first attempt isn’t perfect. Practice regularly to improve your technique.
* **Use High-Quality Products:** Invest in high-quality acrylic powders, liquids, primers, and top coats for better results.
* **Work in a Well-Lit Area:** Ensure that you have adequate lighting to see what you’re doing and avoid mistakes.
* **Take Breaks:** If you’re working on multiple toes, take breaks to prevent fatigue and maintain focus.
* **Be Patient:** Applying acrylic nails can be time-consuming, so be patient and take your time.
## Q&A: Your Acrylic Toenail Questions Answered
Here are some frequently asked questions about applying acrylic nails to toes:
**Q1: How long do acrylic nails last on toes?**
A: With proper application and care, acrylic nails can last for 4-6 weeks on toes.
**Q2: Can acrylic nails damage my natural toenails?**
A: Improper removal or aggressive filing can damage natural toenails. Follow proper techniques to minimize risk.
**Q3: Can I paint over acrylic nails on my toes?**
A: Yes, you can paint over acrylic nails with regular nail polish. Use a base coat to prevent staining and a top coat to seal the polish.
**Q4: How often should I get fill-ins for my acrylic toenails?**
A: Fill-ins are typically needed every 2-3 weeks, depending on the rate of your nail growth.
**Q5: Can I use a regular nail drill to remove acrylic nails from my toes?**
A: Using a nail drill requires skill and caution. Improper use can damage the natural nail. It’s best to soak the nails in acetone for safe removal.
**Q6: Is it safe to apply acrylic nails on toenails during pregnancy?**
A: Consult with your doctor before applying acrylic nails during pregnancy. Some chemicals in acrylic products may be harmful.
**Q7: Can I wear closed-toe shoes with acrylic nails on my toes?**
A: Yes, but avoid wearing shoes that are too tight, as they can put pressure on the acrylic nails and cause damage.
**Q8: How do I prevent my acrylic toenails from lifting?**
A: Proper nail preparation, including dehydrating and priming, is crucial for preventing lifting. Also, avoid getting moisture under the acrylics.
**Q9: Can I fix a broken acrylic nail on my toe at home?**
A: You can temporarily fix a broken acrylic nail with nail glue and a small piece of acrylic. However, it’s best to have it professionally repaired for a long-lasting solution.
**Q10: What are the signs of a fungal infection under acrylic nails?**
A: Signs of a fungal infection include discoloration, thickening, and separation of the nail from the nail bed. If you suspect an infection, seek medical advice.
## Conclusion: Achieve Salon-Worthy Toenails at Home
Mastering how to put acrylic nails on toes empowers you to achieve salon-worthy pedicures from the comfort of your own home. By following the step-by-step guide, troubleshooting common issues, and adhering to proper aftercare practices, you can enjoy long-lasting, beautiful toenails that enhance your overall appearance. Remember, practice makes perfect, so don’t be discouraged if your first attempt isn’t flawless. With patience and dedication, you’ll be able to create stunning acrylic toenails that rival those of professional salons. Share your experiences with applying acrylic nails to toes in the comments below. Explore our other guides for more nail care tips and tricks. Contact our experts for a consultation on how to put acrylic nails on toes.
