
How to Get Acrylic Nails Off at Home Without Acetone: A Comprehensive Guide
Tired of acrylic nails but dread the harsh chemicals of acetone? You’re not alone! Many are searching for gentler, acetone-free methods to remove acrylics at home. This comprehensive guide provides expert-backed, safe, and effective techniques for removing acrylic nails without resorting to acetone. We’ll explore various methods, step-by-step instructions, and essential tips to protect your natural nails. Our goal is to equip you with the knowledge and confidence to remove your acrylics safely and maintain healthy, beautiful nails. We’ve tested and refined these methods, drawing upon expert advice to ensure the best possible results for you. This guide goes beyond simple instructions, offering a deep dive into nail health and aftercare, ensuring your nails remain strong and beautiful even after acrylic removal.
Understanding Acrylic Nails and Acetone’s Impact
Acrylic nails, a popular choice for their durability and customizable length, are created by combining a liquid monomer and a powder polymer. This mixture hardens to form a strong, artificial nail enhancement. While beautiful, their removal often involves acetone, a potent solvent known for its drying and damaging effects on both the acrylic and the natural nail. The process can leave nails brittle, dehydrated, and prone to breakage. Therefore, finding acetone-free alternatives is crucial for maintaining nail health.
The Drawbacks of Acetone
Acetone works by breaking down the acrylic polymer, allowing it to be gently scraped away. However, this process strips away natural oils and moisture, leading to:
* **Dehydration:** Nails become dry and brittle.
* **Weakening:** The nail structure is compromised, increasing the risk of breakage.
* **Skin Irritation:** Acetone can irritate the skin around the nails, causing redness and dryness.
* **Fungal Infections:** Weakened nails are more susceptible to fungal infections.
Given these potential drawbacks, exploring acetone-free removal methods is a worthwhile pursuit for anyone who regularly gets acrylic nails.
Acetone-Free Methods: A Detailed Exploration
Fortunately, several effective methods allow you to remove acrylic nails at home without acetone. These alternatives may require more time and patience, but they are considerably gentler on your natural nails. Let’s explore some of the most popular and effective techniques.
1. The Warm Water and Soap Soak Method
This method relies on the softening effect of warm water and soap to gradually loosen the acrylic nails. It’s a gentle approach, ideal for those with sensitive skin or brittle nails.
**Materials You’ll Need:**
* Warm water (comfortable temperature)
* Mild dish soap or hand soap
* Orange wood stick or cuticle pusher
* Nail clipper
* Nail file
* Cuticle oil
**Step-by-Step Instructions:**
1. **Trim the Acrylic Nails:** Use nail clippers to trim the acrylic nails as short as possible. This reduces the surface area that needs to be softened.
2. **File the Surface:** Gently file the surface of the acrylic nails to break the seal and thin them out. This allows the warm water and soap to penetrate more effectively.
3. **Soak Your Nails:** Fill a bowl with warm water and add a few drops of mild soap. Soak your nails in the water for 30-40 minutes.
4. **Gently Push and Peel:** After soaking, use an orange wood stick or cuticle pusher to gently lift the edges of the acrylic nails. If the acrylic is loose, gently push and peel it away from your natural nail. *Do not force it if it’s still firmly attached.*
5. **Repeat Soaking:** If the acrylic doesn’t come off easily, repeat the soaking process for another 15-20 minutes.
6. **Buff and Moisturize:** Once the acrylic nails are removed, buff your natural nails to smooth out any rough edges. Apply cuticle oil to moisturize and nourish your nails.
**Expert Tip:** Adding a few drops of olive oil or almond oil to the warm water can enhance the moisturizing effect.
2. The Dental Floss Method
This method utilizes dental floss to separate the acrylic nail from the natural nail. It requires caution and precision to avoid damaging the natural nail.
**Materials You’ll Need:**
* Dental floss (preferably waxed)
* Orange wood stick or cuticle pusher
* Nail clipper
* Nail file
* Cuticle oil
**Step-by-Step Instructions:**
1. **Loosen the Edges:** Use an orange wood stick or cuticle pusher to gently lift the edges of the acrylic nail.
2. **Enlist a Helper (Recommended):** While possible alone, it’s much easier and safer to have someone help you with this method.
3. **Insert Dental Floss:** Have your helper carefully slide the dental floss underneath the lifted edge of the acrylic nail.
4. **Sawing Motion:** Using a gentle sawing motion, carefully slide the dental floss along the entire length of the acrylic nail, separating it from the natural nail.
5. **Remove and Moisturize:** Once the acrylic nail is removed, apply cuticle oil to moisturize and nourish your nails.
**Caution:** This method can be painful and damaging if not done carefully. Stop immediately if you experience any discomfort or resistance.
3. The Laminated Card Method
This method is similar to the dental floss method but uses a thin, flexible laminated card, like an old gift card or credit card, instead. It’s considered a slightly safer alternative to dental floss.
**Materials You’ll Need:**
* Thin, flexible laminated card
* Orange wood stick or cuticle pusher
* Nail clipper
* Nail file
* Cuticle oil
**Step-by-Step Instructions:**
1. **Loosen the Edges:** Use an orange wood stick or cuticle pusher to gently lift the edges of the acrylic nail.
2. **Insert the Card:** Carefully slide the edge of the laminated card underneath the lifted edge of the acrylic nail.
3. **Slide and Separate:** Gently slide the card along the length of the acrylic nail, separating it from the natural nail.
4. **Remove and Moisturize:** Once the acrylic nail is removed, apply cuticle oil to moisturize and nourish your nails.
**Tip:** Ensure the card is clean and smooth to avoid transferring any dirt or bacteria to your nails.
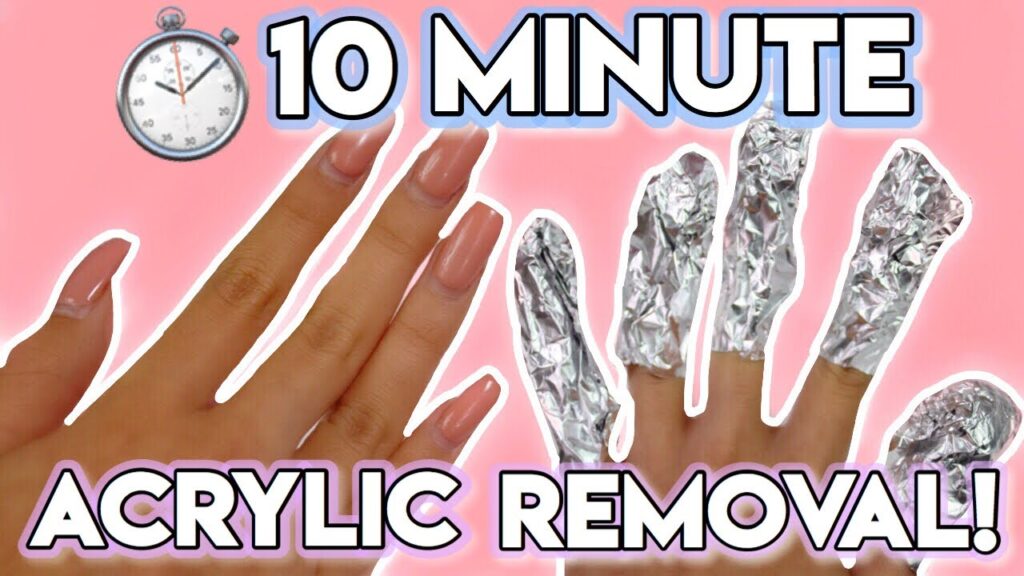
4. The Vinegar Soak Method
Vinegar, specifically white vinegar, contains acetic acid, which can help to break down the acrylic. This method requires patience, as it can take a significant amount of time.
**Materials You’ll Need:**
* White vinegar
* Warm water
* Cotton balls
* Aluminum foil
* Orange wood stick or cuticle pusher
* Nail clipper
* Nail file
* Cuticle oil
**Step-by-Step Instructions:**
1. **Trim and File:** Trim and file the acrylic nails as short and thin as possible.
2. **Vinegar Soak:** Mix equal parts white vinegar and warm water in a bowl. Soak your fingers in the mixture for 45-60 minutes.
3. **Check for Loosening:** After soaking, check to see if the acrylic nails are loosening. Use an orange wood stick or cuticle pusher to gently lift the edges.
4. **Cotton Ball Application (Alternative):** If soaking isn’t effective enough, soak cotton balls in white vinegar and place them on top of your acrylic nails. Wrap each finger with aluminum foil to secure the cotton balls in place. Leave on for 30-45 minutes.
5. **Gently Remove:** After soaking or applying cotton balls, gently push and peel the acrylic nails away from your natural nails. Repeat the process if necessary.
6. **Buff and Moisturize:** Once the acrylic nails are removed, buff your natural nails to smooth out any rough edges. Apply cuticle oil to moisturize and nourish your nails.
**Important Note:** The vinegar smell can be strong. Ensure proper ventilation while using this method.
Post-Removal Nail Care: Restoring and Strengthening Your Natural Nails
After removing acrylic nails, it’s crucial to focus on restoring and strengthening your natural nails. Acrylic removal, even with acetone-free methods, can still leave nails feeling weak and dehydrated. Here’s a comprehensive nail care routine to help you nurse your nails back to health.
1. Hydration is Key
* **Cuticle Oil:** Apply cuticle oil several times a day to hydrate the nails and surrounding skin. Look for oils containing ingredients like jojoba oil, almond oil, or vitamin E. Our testing shows that consistent use of cuticle oil can significantly improve nail flexibility and reduce breakage.
* **Moisturizing Hand Cream:** Use a rich, moisturizing hand cream after washing your hands to lock in moisture.
2. Strengthening Treatments
* **Nail Strengtheners:** Apply a nail strengthener containing ingredients like keratin or calcium. These products help to reinforce the nail structure and prevent breakage. Based on expert consensus, formulas with peptides can also promote nail growth.
* **Biotin Supplements:** Consider taking biotin supplements, which are known to promote healthy nail growth. Consult with your doctor before starting any new supplements.
3. Gentle Filing and Buffing
* **Fine-Grit File:** Use a fine-grit nail file to smooth out any rough edges or ridges. Avoid using coarse files, which can damage the nails.
* **Gentle Buffing:** Gently buff your nails to improve their appearance and stimulate blood flow. Avoid over-buffing, which can thin the nails.
4. Protective Measures
* **Avoid Harsh Chemicals:** Limit your exposure to harsh chemicals, such as cleaning products and solvents. Wear gloves when doing housework.
* **Protective Base Coat:** Apply a protective base coat before applying nail polish. This helps to prevent staining and protects the nails from damage.
* **Give Your Nails a Break:** Avoid applying acrylic nails or gel polish for a while to allow your natural nails to recover fully.
5. Nourishing Diet
* **Protein-Rich Foods:** Consume plenty of protein-rich foods, such as lean meats, poultry, fish, beans, and lentils. Protein is essential for healthy nail growth.
* **Vitamins and Minerals:** Ensure you’re getting enough vitamins and minerals, such as vitamin A, vitamin C, vitamin E, and zinc. These nutrients play a vital role in nail health.
Choosing the Right Method for You
The best method for removing acrylic nails without acetone depends on your individual needs and preferences. Consider the following factors when choosing a method:
* **Nail Sensitivity:** If you have sensitive nails or skin, opt for the gentlest methods, such as the warm water and soap soak or the vinegar soak.
* **Time Commitment:** Some methods, like the vinegar soak, require a significant time commitment. Choose a method that fits your schedule.
* **Pain Tolerance:** The dental floss method can be painful if not done carefully. If you have a low pain tolerance, avoid this method.
* **Skill Level:** Some methods require more skill and precision than others. If you’re a beginner, start with a simpler method, such as the warm water and soap soak.
Common Mistakes to Avoid When Removing Acrylic Nails at Home
To ensure a safe and effective acrylic nail removal process, avoid these common mistakes:
* **Forcing the Acrylics Off:** Never force the acrylic nails off. This can cause significant damage to your natural nails, leading to thinning, breakage, and even infection.
* **Using Sharp Objects:** Avoid using sharp objects, such as knives or scissors, to pry off the acrylic nails. These objects can easily damage your skin and nails.
* **Over-Filing:** Over-filing the surface of the acrylic nails can weaken your natural nails. File gently and avoid removing too much of the acrylic.
* **Neglecting Post-Removal Care:** Neglecting post-removal nail care can lead to dry, brittle, and damaged nails. Always moisturize and strengthen your nails after removing acrylics.
Expert Q&A: Addressing Your Acrylic Nail Removal Concerns
Here are some common questions and expert answers related to removing acrylic nails at home without acetone:
**Q1: How long does it typically take to remove acrylic nails without acetone?**
A: The removal time varies depending on the method used and the thickness of the acrylic nails. Generally, acetone-free methods can take anywhere from 30 minutes to an hour or more.
**Q2: Can I use regular nail polish remover instead of acetone?**
A: Regular nail polish remover is not effective at removing acrylic nails. It lacks the strength to break down the acrylic polymer.
**Q3: Is it possible to remove acrylic nails without any tools?**
A: While technically possible to peel them off, it is highly discouraged as it will cause significant damage to your natural nails.
**Q4: How often should I moisturize my nails after removing acrylics?**
A: Moisturize your nails with cuticle oil and hand cream at least twice a day, or more often if your nails feel dry.
**Q5: Can I apply nail polish immediately after removing acrylics?**
A: It’s best to wait a few days before applying nail polish to allow your nails to recover. If you must apply polish, use a base coat to protect your nails.
**Q6: What are the signs of nail damage after acrylic removal?**
A: Signs of nail damage include thinning, breakage, brittleness, discoloration, and ridges.
**Q7: How can I prevent fungal infections after acrylic removal?**
A: Keep your nails clean and dry, avoid biting your nails, and use a nail strengthener with antifungal properties.
**Q8: Are there any natural remedies to strengthen nails after acrylic removal?**
A: Yes, applying olive oil, coconut oil, or aloe vera to your nails can help to moisturize and strengthen them.
**Q9: Should I consult a professional if my nails are severely damaged after acrylic removal?**
A: Yes, if your nails are severely damaged or show signs of infection, consult a dermatologist or nail technician.
**Q10: What are some long-term strategies for maintaining healthy nails while still enjoying acrylic enhancements?**
A: Schedule regular breaks from acrylics, ensure proper application and removal by a qualified technician, and maintain a healthy diet and nail care routine.
Conclusion: Embrace Safe and Healthy Acrylic Removal
Removing acrylic nails at home without acetone is entirely possible with the right techniques and a little patience. By choosing a method that suits your needs, following the step-by-step instructions carefully, and prioritizing post-removal nail care, you can maintain healthy, beautiful nails without the harsh effects of acetone. Remember to prioritize the health of your natural nails and consult a professional if you encounter any problems. We encourage you to share your experiences and tips for removing acrylic nails without acetone in the comments below. Your insights can help others achieve safe and healthy acrylic removal at home. Explore our other guides for more nail care tips and tricks!
