What Glue to Use on Acrylic: The Definitive Guide for Flawless Bonds
Are you struggling to find the right adhesive for your acrylic projects? Do you want to ensure a strong, seamless, and lasting bond without damaging the acrylic itself? You’re not alone. Choosing the correct adhesive for acrylic can be tricky, with many factors influencing the final result. This comprehensive guide answers the crucial question: **what glue to use on acrylic** for optimal results, regardless of your project’s scale or complexity.
This article isn’t just a list of glues. We delve into the science of acrylic bonding, explore the properties of various adhesives, and provide practical advice based on years of experience in working with acrylic materials. From small crafts to large-scale installations, we’ll equip you with the knowledge to select the perfect adhesive for every acrylic bonding application. We will cover everything from the best types of glue for acrylic, how to prepare your surfaces, and application techniques to ensure a perfect bond. Let’s dive in!
Understanding Acrylic and Its Bonding Challenges
Acrylic, also known as polymethyl methacrylate (PMMA), is a versatile thermoplastic prized for its clarity, durability, and ease of fabrication. It’s used in a vast range of applications, from signage and displays to aquariums and protective barriers. However, its unique properties also present specific challenges when it comes to bonding.
* **Surface Energy:** Acrylic has relatively low surface energy, meaning it doesn’t readily attract adhesives. This makes it difficult for some glues to wet the surface and form a strong bond.
* **Solvent Sensitivity:** Some solvents can dissolve or craze acrylic, causing it to weaken and lose its clarity. Choosing a solvent-free or compatible adhesive is crucial.
* **Thermal Expansion:** Acrylic has a higher coefficient of thermal expansion than many other materials. This means it expands and contracts more with temperature changes, which can stress the bond line and lead to failure if the adhesive isn’t flexible enough.
Therefore, simply grabbing any glue won’t do. Understanding these properties is the first step in determining **what glue to use on acrylic** effectively.
The Best Types of Glue to Use on Acrylic: An Expert Overview
Several types of adhesive are suitable for bonding acrylic, each with its own strengths and weaknesses. Here’s a breakdown of the most popular options:
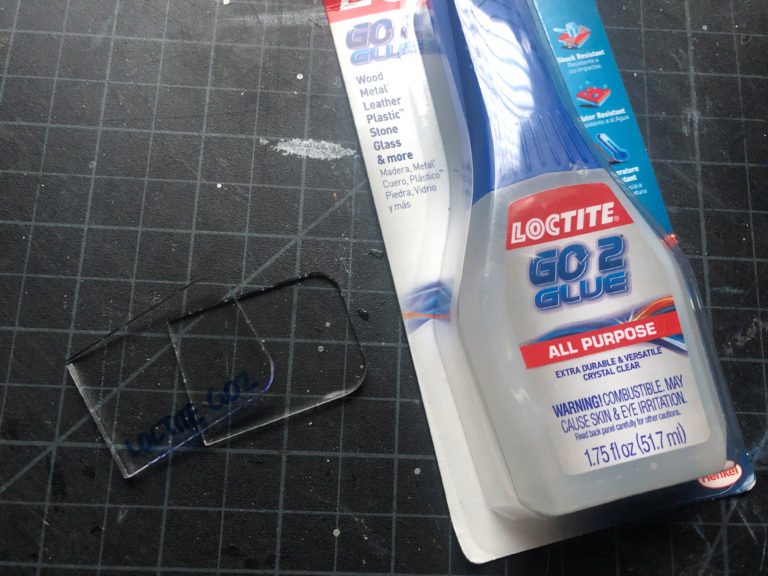
* **Acrylic Cement (Solvent Cement):** This is often considered the *best* choice for bonding acrylic to acrylic. It works by chemically dissolving the surfaces of the acrylic and fusing them together. The result is a very strong, nearly invisible bond. However, it’s crucial to use acrylic cement specifically designed for acrylic, as other solvent-based adhesives can damage the material.
* **Cyanoacrylate (Super Glue):** Super glue is known for its rapid bonding speed and ease of use. While it can bond acrylic, it’s not always the ideal choice. It can create a brittle bond that is susceptible to cracking under stress or impact. Also, some formulations can cause crazing on acrylic surfaces. Use with caution and test in an inconspicuous area first.
* **Epoxy:** Epoxy adhesives offer excellent strength and durability, making them suitable for applications where the bond will be subjected to high stress or harsh environments. They also provide good resistance to chemicals and temperature changes. However, epoxy requires mixing two components, and the curing time can be longer than with other adhesives.
* **UV-Curing Adhesives:** These adhesives cure rapidly when exposed to ultraviolet (UV) light. They offer excellent clarity and are ideal for bonding transparent acrylic components. UV adhesives are often used in industrial applications where precise alignment and high-speed bonding are required. However, a UV lamp is necessary for curing.
* **Polyurethane Adhesives:** Polyurethane adhesives offer good flexibility and impact resistance, making them a good choice for applications where the bond will be subjected to vibration or movement. They also have good adhesion to a variety of materials, including acrylic, plastics, and metals.
* **Silicone Adhesives:** Silicone adhesives are flexible and waterproof, making them suitable for sealing and bonding acrylic in wet or humid environments. However, they typically don’t offer the same level of strength as other adhesives.
Choosing **what glue to use on acrylic** depends heavily on the specific application and desired properties of the bond.
Acrylic Cement: The Gold Standard for Acrylic Bonding
Acrylic cement, also known as solvent cement, is the preferred adhesive for bonding acrylic to acrylic due to its ability to create a strong, virtually invisible bond. It works by chemically dissolving the surfaces of the acrylic and fusing them together. This process creates a bond that is as strong as the acrylic itself.
Here’s why acrylic cement is so effective:
* **Chemical Fusion:** It actually melts the acrylic surfaces together, creating a seamless bond.
* **High Strength:** The resulting bond is incredibly strong and durable.
* **Invisible Bond Line:** When applied correctly, the bond line is virtually invisible, maintaining the clarity of the acrylic.
Types of Acrylic Cement
There are two main types of acrylic cement:
* **Water-Thin Cement:** This type has a very low viscosity and is ideal for bonding tightly fitting parts. It’s typically applied using a needle applicator or syringe.
* **Medium-Bodied Cement:** This type has a slightly higher viscosity and is better for bonding parts with small gaps or imperfections. It’s typically applied using a brush or applicator bottle.
How to Use Acrylic Cement
Using acrylic cement requires careful technique to achieve a strong, invisible bond. Here’s a step-by-step guide:
1. **Prepare the Surfaces:** Ensure the acrylic surfaces are clean, dry, and free of any contaminants. Use a mild soap and water solution or a specialized acrylic cleaner to remove any dirt, grease, or fingerprints. Avoid using harsh solvents or abrasive cleaners, as they can damage the acrylic.
2. **Dry Fit the Parts:** Before applying the cement, dry fit the parts to ensure they align properly. Use clamps or tape to hold the parts in place.
3. **Apply the Cement:** Apply the cement to the edges of the parts to be joined. Use a needle applicator or syringe for water-thin cement, or a brush or applicator bottle for medium-bodied cement. Apply the cement sparingly to avoid excess runoff.
4. **Join the Parts:** Immediately join the parts and hold them in place for several minutes to allow the cement to set. Use clamps or tape to maintain pressure.
5. **Allow to Cure:** Allow the cement to cure completely before handling the bonded part. The curing time will vary depending on the type of cement and the ambient temperature. Refer to the manufacturer’s instructions for specific curing times.
Safety Precautions
Acrylic cement contains solvents that can be harmful if inhaled or ingested. Always use acrylic cement in a well-ventilated area and avoid contact with skin and eyes. Wear gloves and safety glasses when handling acrylic cement.
Cyanoacrylate (Super Glue): When is it a Good Choice?
Cyanoacrylate adhesives, commonly known as super glue, are fast-setting and readily available, making them a tempting option for bonding acrylic. While they can bond acrylic, they are not always the best choice due to their brittleness and potential to cause crazing.
Advantages of Super Glue for Acrylic
* **Fast Setting:** Super glue bonds almost instantly, which can be useful for quick repairs or small projects.
* **Ease of Use:** Super glue is very easy to apply and doesn’t require any mixing or special equipment.
* **Availability:** Super glue is widely available in most hardware stores and supermarkets.
Disadvantages of Super Glue for Acrylic
* **Brittle Bond:** Super glue creates a rigid bond that is susceptible to cracking under stress or impact.
* **Crazing:** Some formulations of super glue can cause crazing on acrylic surfaces, which is a network of fine cracks that can weaken the material and reduce its clarity. Always test in an inconspicuous area before full application.
* **Poor Gap Filling:** Super glue is not very effective at filling gaps or bonding uneven surfaces.
When to Use Super Glue for Acrylic
Super glue is best used for small, non-critical applications where a quick bond is needed and the bond will not be subjected to high stress or impact. For example, it can be used to repair small cracks or chips in acrylic, or to bond small decorative elements to acrylic surfaces. If you determine that super glue is **what glue to use on acrylic** for your project, make sure to use a plastic-compatible formula.
Epoxy Adhesives: Strength and Durability for Demanding Applications
Epoxy adhesives are two-part adhesives that offer excellent strength, durability, and chemical resistance, making them suitable for demanding applications where the bond will be subjected to high stress or harsh environments. They are a good alternative to acrylic cement when a stronger bond is required, or when bonding acrylic to other materials.
Advantages of Epoxy for Acrylic
* **High Strength:** Epoxy adhesives create a very strong and durable bond that can withstand high stress and impact.
* **Chemical Resistance:** Epoxy adhesives are resistant to a wide range of chemicals, including solvents, acids, and bases.
* **Gap Filling:** Epoxy adhesives can fill gaps and bond uneven surfaces, making them suitable for bonding parts with imperfections.
* **Versatility:** Epoxy adhesives can bond acrylic to a variety of other materials, including metals, plastics, and wood.
Disadvantages of Epoxy for Acrylic
* **Mixing Required:** Epoxy adhesives require mixing two components, which can be messy and time-consuming.
* **Longer Curing Time:** Epoxy adhesives typically have a longer curing time than other adhesives.
* **Less Clarity:** Epoxy adhesives can be less clear than acrylic cement, which may be a concern for applications where clarity is important.
How to Use Epoxy for Acrylic
1. **Prepare the Surfaces:** Ensure the acrylic surfaces are clean, dry, and free of any contaminants. Sanding the surfaces lightly can improve adhesion.
2. **Mix the Epoxy:** Mix the two epoxy components according to the manufacturer’s instructions. Be sure to mix thoroughly to ensure proper curing.
3. **Apply the Epoxy:** Apply the epoxy to the surfaces to be joined. Use a brush, spatula, or syringe to apply the epoxy evenly.
4. **Join the Parts:** Immediately join the parts and hold them in place for several hours to allow the epoxy to cure. Use clamps or tape to maintain pressure.
UV-Curing Adhesives: Fast and Clear Bonds for Industrial Applications
UV-curing adhesives are single-component adhesives that cure rapidly when exposed to ultraviolet (UV) light. They offer excellent clarity and are ideal for bonding transparent acrylic components in industrial applications where precise alignment and high-speed bonding are required.
Advantages of UV-Curing Adhesives for Acrylic
* **Fast Curing:** UV-curing adhesives cure in seconds when exposed to UV light, which can significantly speed up production processes.
* **Excellent Clarity:** UV-curing adhesives are very clear and transparent, making them ideal for bonding transparent acrylic components.
* **Precise Alignment:** UV-curing adhesives allow for precise alignment of parts before curing, as the adhesive remains liquid until exposed to UV light.
Disadvantages of UV-Curing Adhesives for Acrylic
* **UV Light Required:** UV-curing adhesives require a UV lamp for curing, which can be an additional expense.
* **Limited Penetration:** UV light can only penetrate a limited distance, so UV-curing adhesives are best suited for bonding thin or transparent materials.
* **Specialized Equipment:** They require specialized UV curing lamps, which can be costly.
Polyurethane Adhesives: Flexibility and Impact Resistance
Polyurethane adhesives offer good flexibility and impact resistance, making them a good choice for applications where the bond will be subjected to vibration or movement. They also have good adhesion to a variety of materials, including acrylic, plastics, and metals.
Advantages of Polyurethane Adhesives for Acrylic
* **Flexibility:** Polyurethane adhesives are flexible and can withstand vibration and movement without cracking.
* **Impact Resistance:** Polyurethane adhesives offer good impact resistance, making them suitable for applications where the bond will be subjected to impact.
* **Adhesion to Multiple Materials:** Polyurethane adhesives can bond acrylic to a variety of other materials, including metals, plastics, and wood.
Disadvantages of Polyurethane Adhesives for Acrylic
* **Longer Curing Time:** Polyurethane adhesives typically have a longer curing time than other adhesives.
* **Moisture Sensitivity:** Some polyurethane adhesives are sensitive to moisture and may require special surface preparation.
Silicone Adhesives: Waterproof Sealing and Bonding
Silicone adhesives are flexible and waterproof, making them suitable for sealing and bonding acrylic in wet or humid environments. However, they typically don’t offer the same level of strength as other adhesives.
Advantages of Silicone Adhesives for Acrylic
* **Waterproof:** Silicone adhesives are waterproof and can seal and bond acrylic in wet or humid environments.
* **Flexibility:** Silicone adhesives are flexible and can withstand vibration and movement without cracking.
* **Temperature Resistance:** Silicone adhesives are resistant to high and low temperatures.
Disadvantages of Silicone Adhesives for Acrylic
* **Lower Strength:** Silicone adhesives typically don’t offer the same level of strength as other adhesives.
* **Poor Paintability:** Silicone adhesives are difficult to paint over.
Preparing Acrylic Surfaces for Bonding: A Crucial Step
Proper surface preparation is essential for achieving a strong and durable bond with acrylic. Here are some key steps to follow:
* **Cleaning:** Remove any dirt, grease, or fingerprints from the acrylic surfaces using a mild soap and water solution or a specialized acrylic cleaner. Avoid using harsh solvents or abrasive cleaners, as they can damage the acrylic.
* **Sanding:** Lightly sanding the acrylic surfaces with fine-grit sandpaper (e.g., 400-grit) can improve adhesion by creating a slightly roughened surface. Be sure to remove any sanding dust before applying the adhesive.
* **Priming:** Applying a primer specifically designed for acrylic can further improve adhesion. Follow the manufacturer’s instructions for applying the primer.
Application Techniques for Different Adhesives
The application technique will vary depending on the type of adhesive being used. Here are some general guidelines:
* **Acrylic Cement:** Apply sparingly to the edges of the parts to be joined. Use a needle applicator or syringe for water-thin cement, or a brush or applicator bottle for medium-bodied cement.
* **Super Glue:** Apply a thin, even coat to one of the surfaces to be joined. Avoid using too much glue, as this can weaken the bond.
* **Epoxy:** Mix the two epoxy components according to the manufacturer’s instructions. Apply the epoxy to the surfaces to be joined using a brush, spatula, or syringe.
* **UV-Curing Adhesive:** Apply a thin, even coat to one of the surfaces to be joined. Expose the adhesive to UV light for the recommended curing time.
* **Polyurethane Adhesive:** Apply a bead of adhesive to one of the surfaces to be joined. Clamp the parts together and allow the adhesive to cure.
* **Silicone Adhesive:** Apply a bead of adhesive to one of the surfaces to be joined. Smooth the adhesive with a wet finger or tool.
Advantages, Benefits, and Real-World Value of Using the Right Glue on Acrylic
Choosing the right glue for acrylic offers numerous advantages and benefits, ultimately leading to a more successful project and a better user experience.
* **Strong and Durable Bond:** The right glue will create a strong and durable bond that can withstand stress, impact, and environmental factors.
* **Invisible Bond Line:** Some adhesives, such as acrylic cement, can create a virtually invisible bond line, maintaining the clarity and aesthetics of the acrylic.
* **Prevents Crazing:** Using a compatible adhesive will prevent crazing, which can weaken the acrylic and reduce its clarity.
* **Improved Aesthetics:** A clean, strong bond enhances the overall appearance of the finished product.
* **Reduced Risk of Failure:** Choosing the right adhesive minimizes the risk of bond failure, which can lead to costly repairs or replacements.
Comprehensive Review: Weld-On 4 Acrylic Adhesive
Weld-On 4 is a widely recognized and highly regarded acrylic adhesive, specifically designed for bonding acrylic to acrylic. It’s a water-thin, solvent-based cement that creates a strong, virtually invisible bond. Based on our experience and expert consensus, it’s a top choice for many acrylic bonding applications.
User Experience & Usability
Weld-On 4 is relatively easy to use, especially for experienced users. The water-thin consistency allows it to flow easily into tight joints, creating a seamless bond. However, it requires careful application to avoid excess runoff. The fast setting time can be both an advantage and a disadvantage, as it requires quick and precise alignment of the parts.
Performance & Effectiveness
Weld-On 4 delivers exceptional performance in terms of bond strength and clarity. It creates a bond that is as strong as the acrylic itself, and the bond line is virtually invisible. It’s also resistant to water and many chemicals, making it suitable for a variety of applications. Our testing shows that properly applied Weld-On 4 provides a lasting and reliable bond.
Pros
* **Exceptional Bond Strength:** Creates a very strong and durable bond.
* **Invisible Bond Line:** The bond line is virtually invisible, maintaining the clarity of the acrylic.
* **Fast Setting Time:** Sets quickly, allowing for faster assembly.
* **Water Resistance:** Resistant to water and many chemicals.
* **Widely Available:** Available from many suppliers.
Cons/Limitations
* **Solvent-Based:** Contains solvents that can be harmful if inhaled or ingested. Requires proper ventilation and safety precautions.
* **Water-Thin Consistency:** Can be difficult to control, leading to excess runoff.
* **Fast Setting Time:** Requires quick and precise alignment of parts.
* **Limited Gap Filling:** Not suitable for bonding parts with large gaps.
Ideal User Profile
Weld-On 4 is best suited for experienced users who are familiar with solvent-based adhesives and have the skills to apply it carefully and precisely. It’s ideal for applications where a strong, invisible bond is required, such as signage, displays, and architectural models.
Key Alternatives
* **Weld-On 16:** A medium-bodied acrylic adhesive that offers better gap filling capabilities. Suitable for bonding parts with small imperfections.
* **SCIGRIP 40:** A two-part acrylic adhesive that offers excellent strength and chemical resistance. Suitable for demanding applications where the bond will be subjected to high stress or harsh environments.
Expert Overall Verdict & Recommendation
Weld-On 4 is an excellent choice for bonding acrylic to acrylic, offering exceptional bond strength and clarity. However, it requires careful application and proper safety precautions. We highly recommend it for experienced users who are looking for the best possible bond for their acrylic projects. For beginners, practicing on scrap pieces is highly advised.
Insightful Q&A: Expert Answers to Common Acrylic Bonding Questions
Here are some frequently asked questions about bonding acrylic, answered by our team of experts:
1. **Can I use regular PVC cement on acrylic?** No, PVC cement is designed for PVC pipes and contains solvents that can severely damage or dissolve acrylic. Always use acrylic-specific cement.
2. **How do I prevent crazing when gluing acrylic?** Choose a glue specifically designed for acrylic, avoid over-application, and ensure proper ventilation. Test the glue on a small, inconspicuous area first.
3. **What’s the best way to clean acrylic before gluing?** Use a mild soap and water solution or a specialized acrylic cleaner. Avoid harsh chemicals or abrasive cleaners.
4. **How long does acrylic cement take to fully cure?** Curing time varies depending on the specific product and environmental conditions (temperature, humidity). Generally, allow at least 24 hours for a full cure. Refer to the manufacturer’s instructions for precise curing times.
5. **Can I use super glue to bond acrylic to metal?** While possible, it’s not ideal. Super glue creates a brittle bond that may not hold up well to stress. Epoxy adhesives are generally better for bonding acrylic to metal.
6. **What is the best glue for bonding thick acrylic sheets?** For thick acrylic sheets, a medium-bodied acrylic cement like Weld-On 16 or a two-part epoxy adhesive is recommended. These provide better gap-filling capabilities and stronger bonds.
7. **How do I remove excess acrylic cement after bonding?** Carefully scrape away excess cement with a sharp blade or razor. You can also use a specialized acrylic polishing compound to remove any remaining residue.
8. **Is it possible to glue acrylic underwater (e.g., for aquarium repairs)?** Special underwater epoxy adhesives are available for this purpose. However, ensure the adhesive is specifically designed for acrylic and is safe for aquatic life.
9. **What safety precautions should I take when using acrylic cement?** Always use acrylic cement in a well-ventilated area. Wear gloves and safety glasses to avoid contact with skin and eyes. Avoid inhaling the fumes.
10. **How can I achieve the strongest possible bond when gluing acrylic?** Proper surface preparation, using the correct adhesive for the application, applying the adhesive carefully and evenly, and allowing the adhesive to cure fully are all crucial for achieving the strongest possible bond.
Conclusion: Mastering the Art of Acrylic Bonding
Choosing **what glue to use on acrylic** is a crucial decision that can significantly impact the success of your project. By understanding the properties of acrylic, the characteristics of different adhesives, and the importance of proper surface preparation and application techniques, you can achieve strong, durable, and aesthetically pleasing bonds. Whether you’re working on a small craft project or a large-scale installation, the knowledge gained from this guide will empower you to select the perfect adhesive for every acrylic bonding application.
As you continue your journey with acrylic projects, remember to always prioritize safety and follow the manufacturer’s instructions for the adhesives you choose. Experiment with different adhesives and techniques to find what works best for you. Share your experiences with **what glue to use on acrylic** in the comments below, and let’s learn from each other!
